Get started with StaffCounter cloud service: registration and setup
Step 1: Register and Set Up Your Account
Visit StaffCounter.net and register using your email address.
After registration, you’ll receive a confirmation email — click the link inside to activate your account.
Each new user is automatically assigned the Standard plan, which includes a free trial period.
Once logged in, you’ll see an empty dashboard with two default departments: Office and Mobile.
Before installing the agent, go to Settings in the main menu to customize your monitoring preferences. There, you can:
- Allow or restrict users from pausing and resuming monitoring
- Show or hide the StaffCounter icon on employee devices
- Select the types of data to collect (e.g., app usage, websites, screenshots)

Step 2: Configure Reports and Alerts
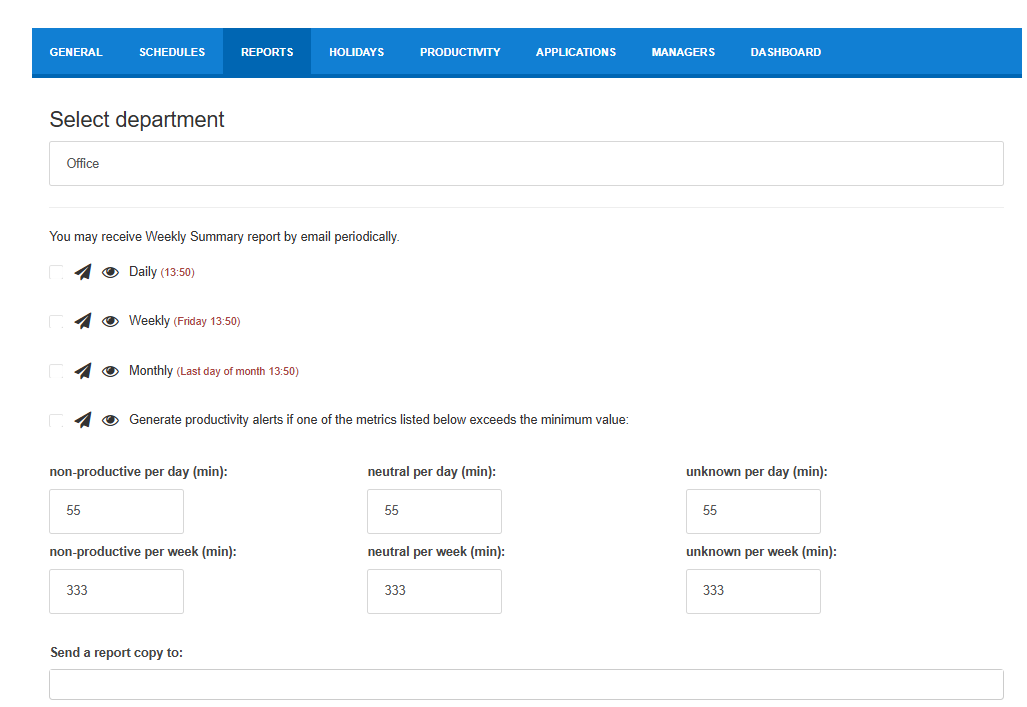
Under the Reports tab, enter an email address to receive Summary Reports.
These can be scheduled to arrive daily, weekly, monthly, or at custom intervals based on your needs.
You can also enable Automatic Alerts.
When activated, StaffCounter will detect potential policy violations or suspicious activity and notify you immediately, enabling a fast response.
Step 3: Define Work Schedule and Install the Agent
In the Schedules tab, set the official start and end times for your workday.
This helps StaffCounter accurately track productive hours and generate meaningful reports.
Once configuration is complete, proceed to install the StaffCounter Agent on your employees’ computers and mobile devices.