How to install StaffCounter PRO on Android: step-by-step guide
How to prepare your phone for the StaffCounter PRO installation
- Temporarily disable antivirus protection, as any monitoring app may be flagged as spyware;
- On Android 5 and 6, go to Device Settings → Security → Unknown Sources (allow installation of apps from outside the Play Store);
- Uninstall other monitoring applications, including the free version of the StaffCounter agent, as it is incompatible with StaffCounter PRO;
- Uninstall Helper Service and Support Android if previously installed;
- Disable Play Store Protection — Learn how to do it >>;
- Go to the Download page and download StaffCounter PRO for Android;
- Install PRO_agent.apk.
First launch of the StaffCounter PRO application 1.6.179 on Android 5.1 and newer
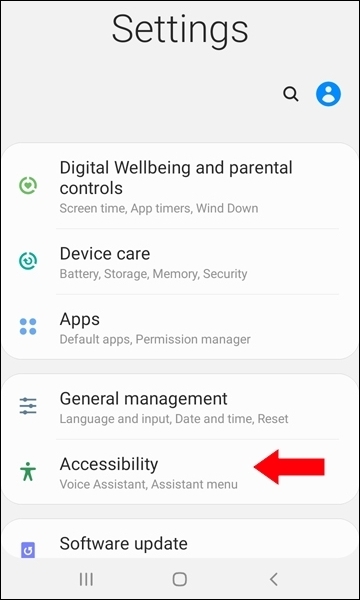
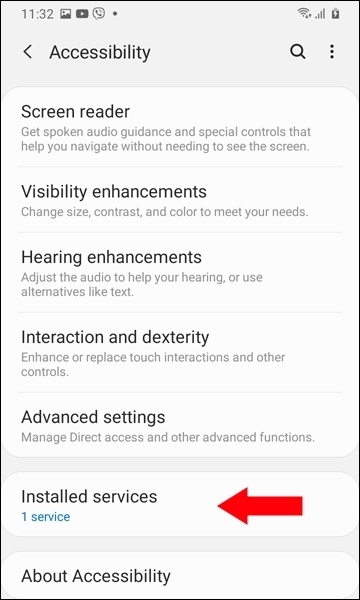
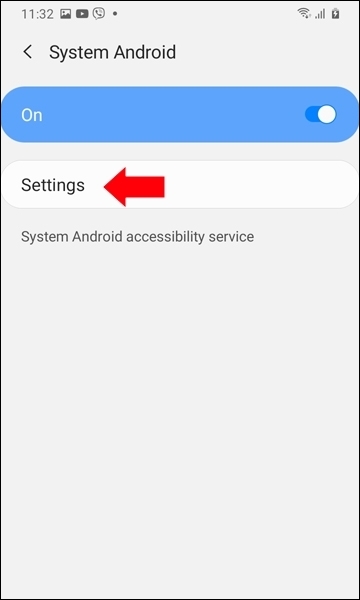
- Open the phone’s Settings, go to Accessibility. Find System Android and activate it.
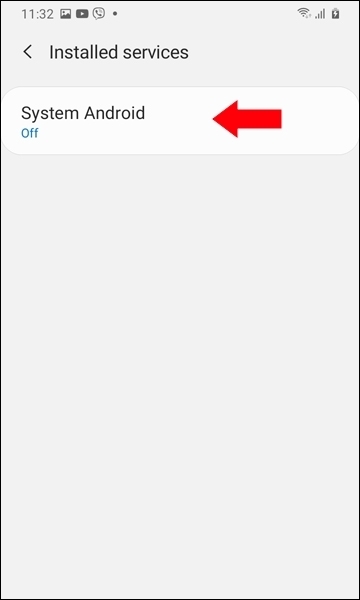

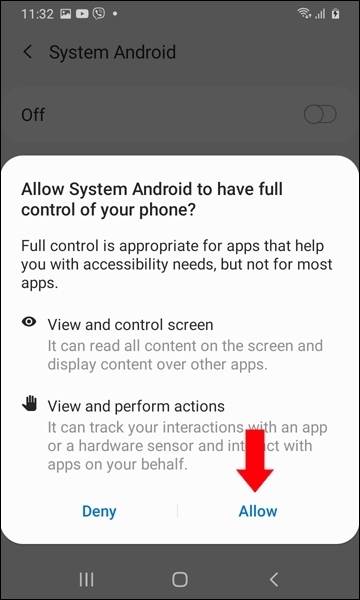
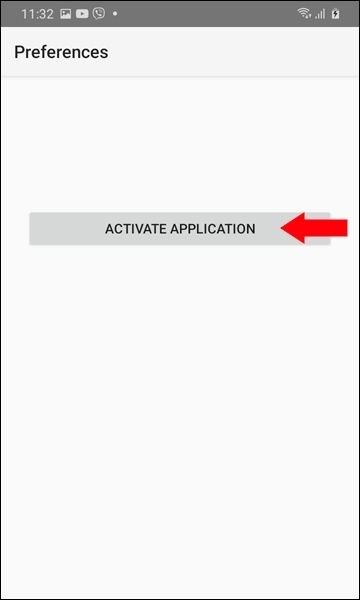
2. Tap Settings, then Activate the application. Grant access to all required resources for the System Android app;
Note: If Accessibility is not allowed for this app, do the following:
- Open Settings → Applications → System Android → Menu → Allow restricted settings. Confirm with your password or fingerprint.
- Go to Settings → Accessibility. Turn on System Android.
- Repeat steps 1–2.
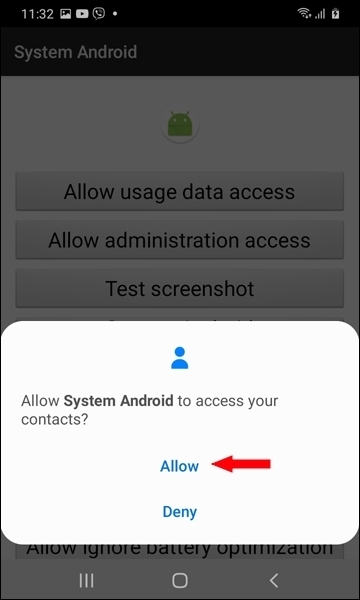
3. Now grant access to all necessary phone resources.
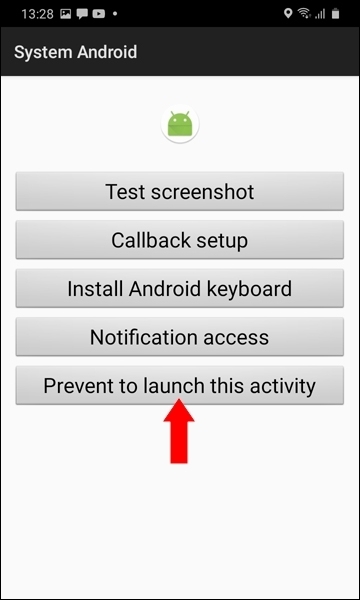
4. Then, tap all the buttons from top to bottom to configure and connect the app to your account.
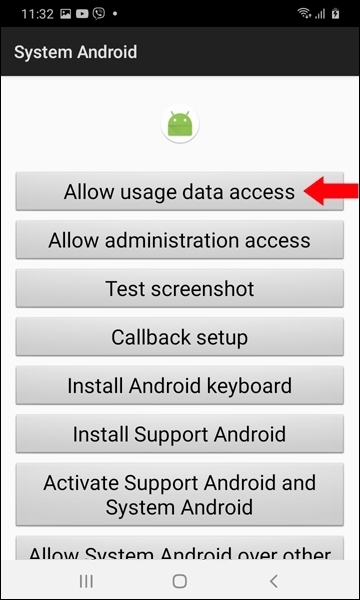
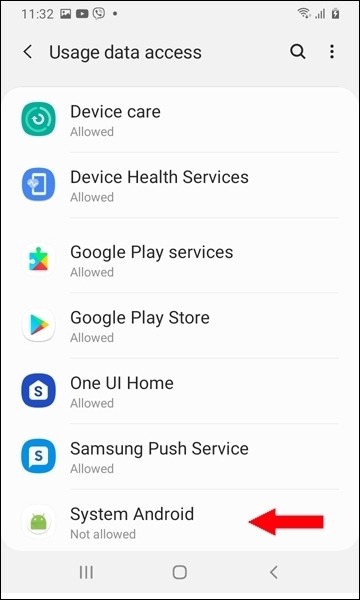
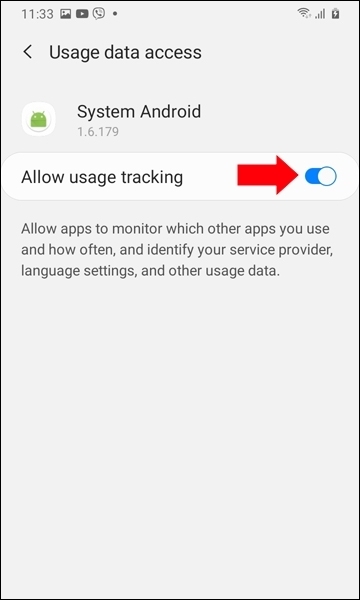
5. Tap Allow usage data access; tap System Android; enable Allow usage tracking.
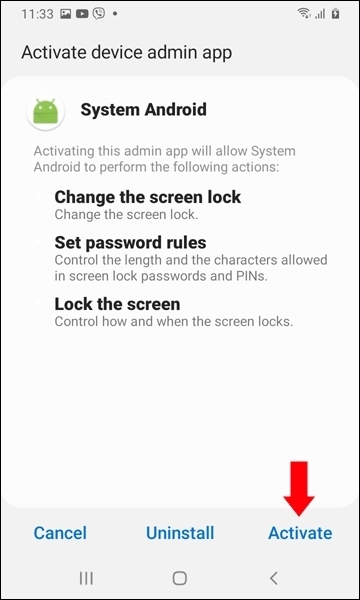
6. Go back and tap Allow Administration access; tap Activate.
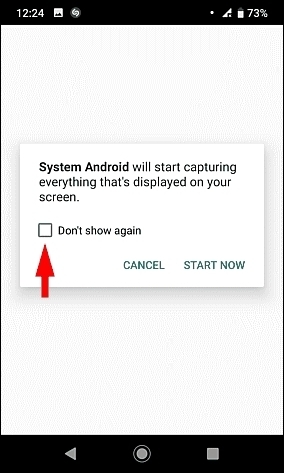
7. Tap the Test Screenshot button. Set your phone not to ask again, then tap Start.
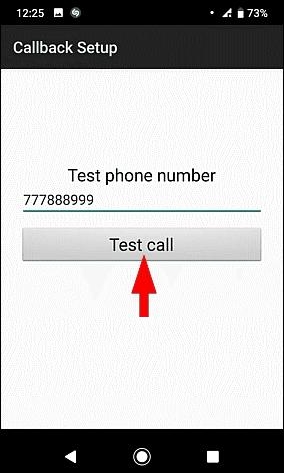
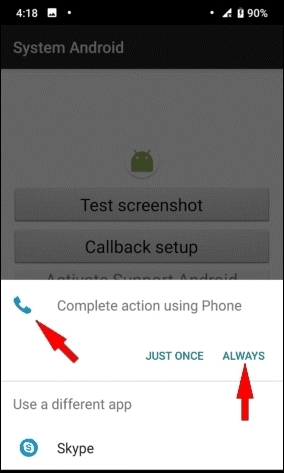
8. Tap the Callback setup button. Enter any phone number and tap Test call. Select the Phone app and tap Always.
9. Go back and tap Install Support Android; tap Install.
10. Go back and tap Activate Support Android and System Android; enable both Support Android and System Android.
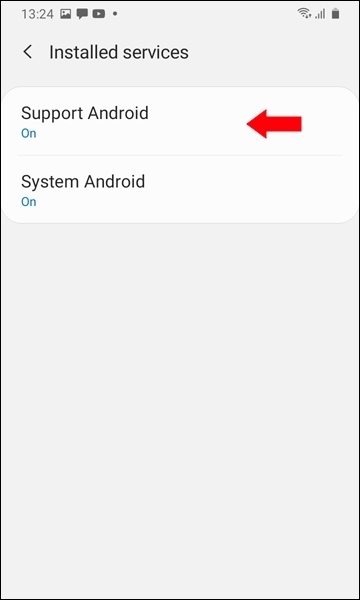
Note: If Accessibility is not allowed for Support Android, do the following:
- Open Settings → Applications → System Android → Menu → Allow restricted settings. Confirm with password or fingerprint.
- Go to Settings → Accessibility → Support Android and turn it on.
11. Go back and tap Allow System Android over other apps.
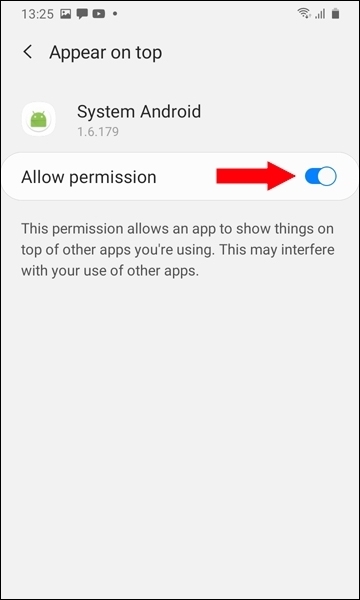
- Repeat the same step for Support Android.
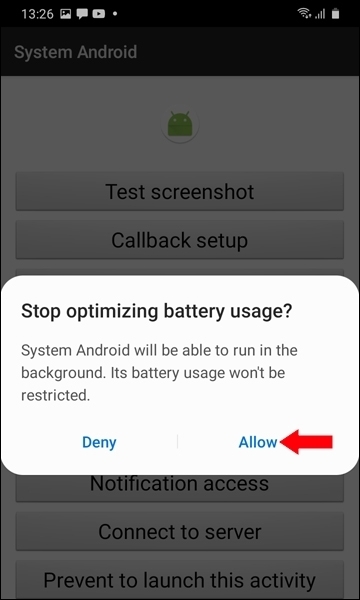
12. Tap Allow ignore battery optimizations for System Android.
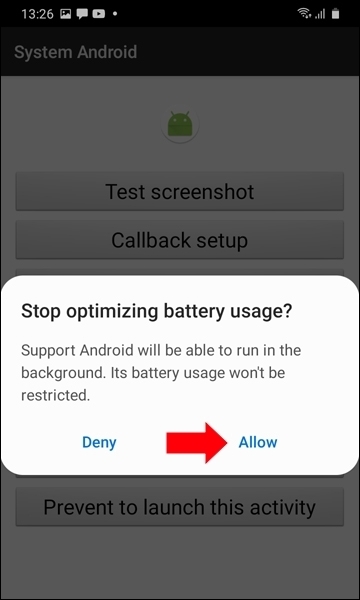
- Repeat the same for Support Android.
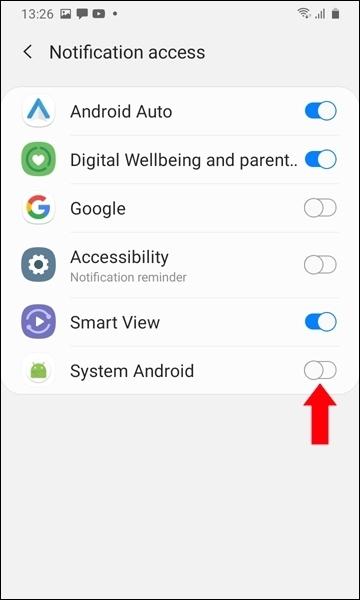
13. Go back and tap Notification Access. Allow the Android System app to access notifications.
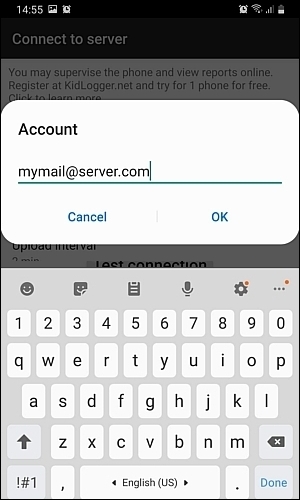
14. Go back and tap Connect to Server.
- Tap Select Server to upload. Choose data.staffcounter.net. Tap Your account. Enter the email address you used to register on staffcounter.net.
15. Go back and tap Prevent to launch this activity.
16. Delete the installation packages if no longer needed.