Installing the StaffCounter agent on a Windows computer

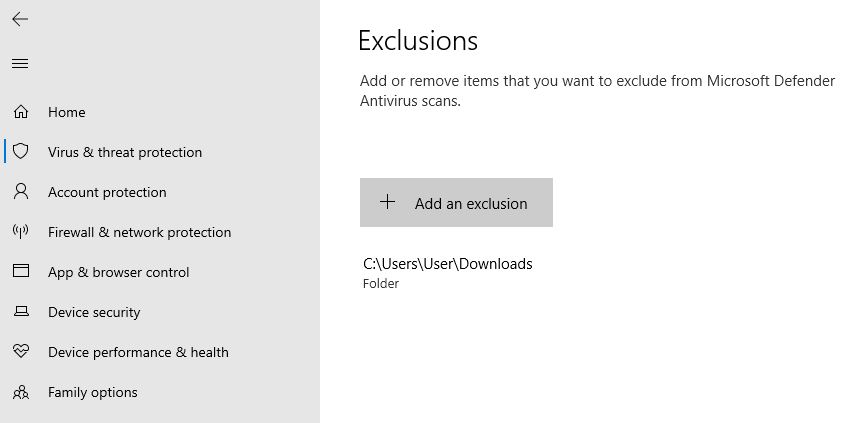
Step 1. Whitelist the Downloads folder in your antivirus software. If you don’t have a third-party antivirus, open the Control Panel, go to Update & Security > Windows Security, then navigate to Virus & threat protection > Exclusions. Add the Downloads folder to the exclusion list.
Step 2. Download the StaffCounter Agent. Extract the .zip archive into a new folder.
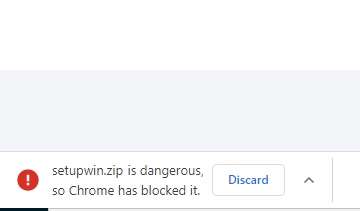
If Google Chrome doesn’t allow downloading the agent
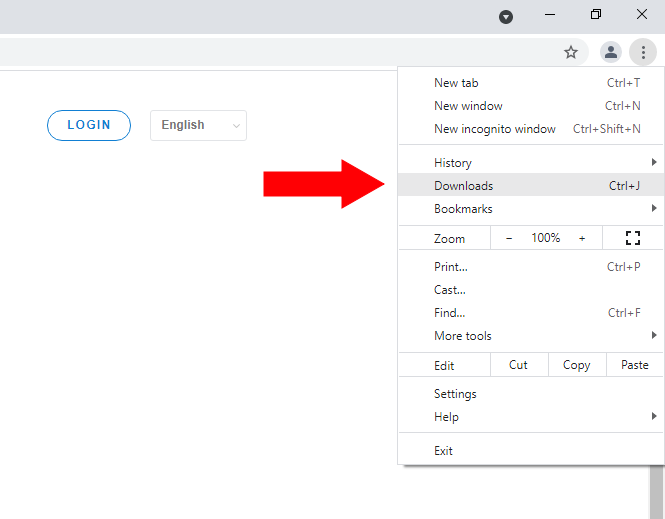
You need to open the Chrome browser’s menu and navigate to the Downloads section.
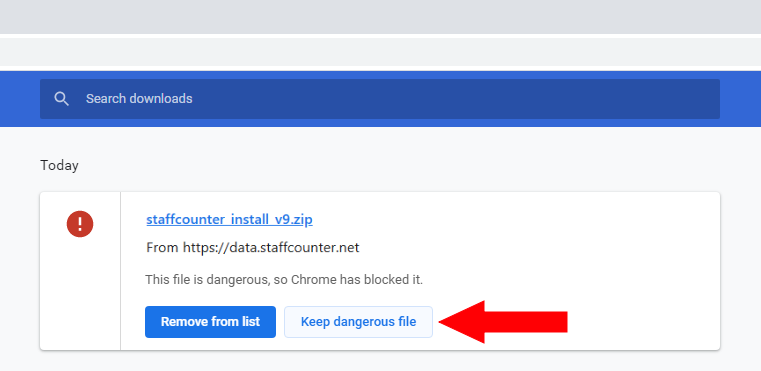
Click Keep dangerous file.
 Step 3. Add the installer file (staffcounter_install.exe) to the exclusions list in Windows Security or your third-party antivirus.
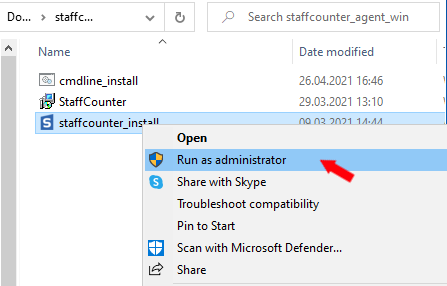
Step 4. Run staffcounter_install.exe as administrator. Right-click the file and select Run as administrator.
Step 5. Whitelist the application files in the Program Files (x86)\StaffCounter folder. Then launch StaffCounter.exe as administrator (right-click → Run as administrator).
Step 6. On first launch, you must connect the agent to the server at data.staffcounter.net.

You can complete this step in one of three ways:
- Using your main StaffCounter account email: Enter the login email address for your StaffCounter account in the main window. You can view your email on the profile page.
- Using an existing device ID: Click the Edit icon next to the device name and locate the device ID to reconnect the agent without creating a new device or losing user data.
- Using an invitation via email: When adding a new employee, their email address becomes the device ID. After installing the agent, they will enter the same email to connect it.
For Windows XP, the installer will automatically offer the appropriate version.
Once the program connects to the server, monitoring starts automatically. The agent retrieves its settings from the server each time the user logs in.
Step 7: Configure settings via your online account. Log in to your account and go to Settings. Select the required department, adjust the settings, and save your changes. Restart the target computer to apply them.