How to connect a new drive to the local server
By default, the hard disk of the local server has a capacity of 500 GB. But what will happen if the amount of stored files exceeds this limit?
Let’s make a simple calculation: if one virtual device requires up to 500 MB, then a 500 GB disk can handle about 1000 devices. However, in real companies, departments often have far more employees and computers.
If the disk space runs out, new files will not be created, which will eventually cause server malfunctions.
To prevent this situation, we can expand the available space by connecting an additional drive (either a physical hard disk or a virtual one). Then we will configure the system so that user data will be stored on this new disk.
The process consists of the following steps:
- Adding a real or virtual disk to the virtual machine
- Detecting the new disk in the system
- Creating a partition on the disk
- Formatting the partition
- Mounting the disk into a temporary folder
- Moving existing data to the new disk
- Unmounting the disk
- Cleaning the old folder
- Mounting the new disk into the original data folder
- Checking the correctness of the mount
- Configuring automatic mounting after reboot
- Setting access rights for the data folder
1. Adding a real or virtual disk to the virtual machine
First, add a new disk to the virtual machine. This can be either a virtual disk of the desired size or a physical hard drive connected to the server. 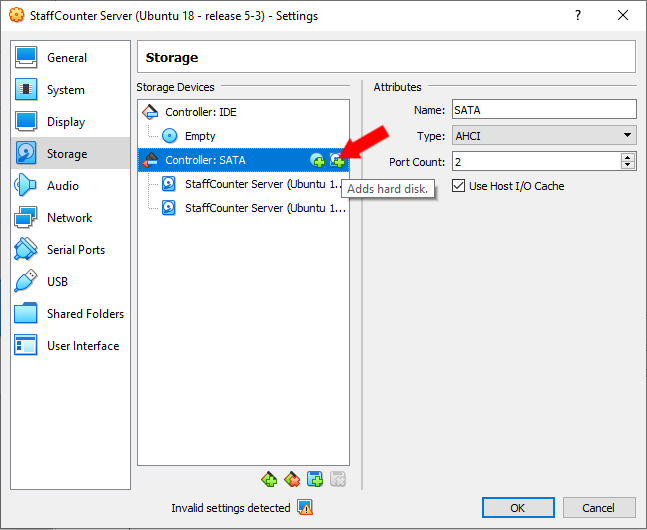
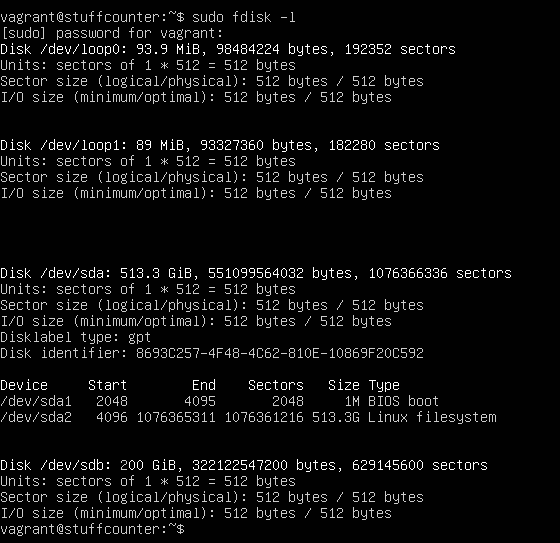
2. Detecting the new disk
Start the virtual machine and log into your user account. To check the available disks, run:
sudo fdisk -l
This command lists all disks and their partitions. At the bottom of the list, you should see a new device (for example, /dev/sdb) without partitions. Note that in your case the name may differ.
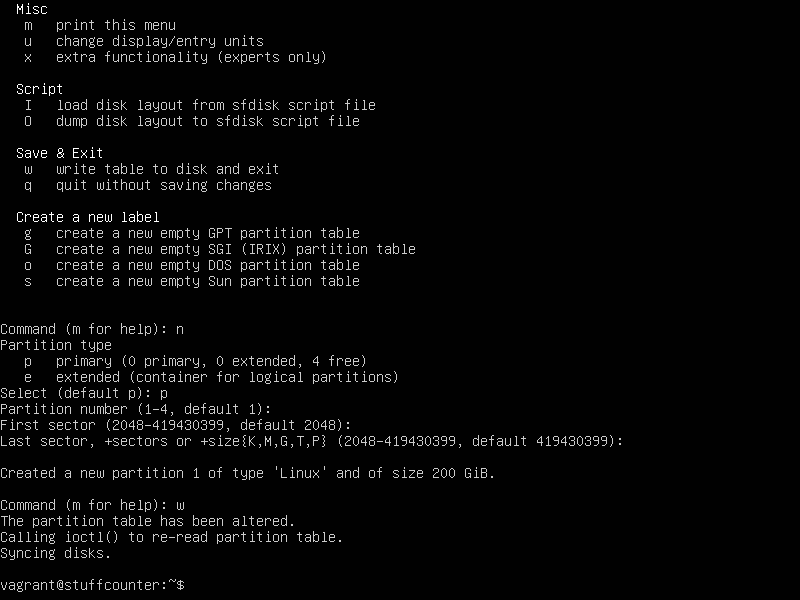
3. Creating a partition on the new disk
To create a partition on the new disk, run:
sudo fdisk /dev/sdb
Tips:
If this is your first time using fdisk, type m to see the available commands.
Enter n to create a new partition.
Choose p to make it a primary partition.
If you want to use the entire disk, just accept the default values.
When finished, type w to save changes and exit. This will create a new partition, usually called /dev/sdb1 (the name may vary).
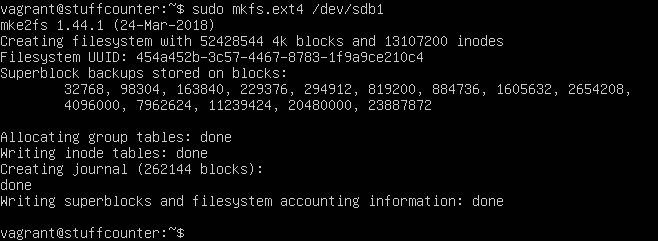
4. Formatting the partition
Next, format the partition and create an ext4 filesystem:
sudo mkfs.ext4 /dev/sdb1
5. Mounting the disk into a temporary folder
Since the server may already contain user data, we must first mount the new disk into a temporary folder. This allows us to transfer data safely.
Create a folder for temporary mounting:
sudo mkdir /usr/data
Mount the new partition there:
sudo mount -t ext4 /dev/sdb1 /usr/data

6. Moving existing files to the new disk
Open Midnight Commander (mc) with administrator rights:
sudo mc
Move all files and folders from:
/var/www/client/public/files/
to the new folder:
/usr/data
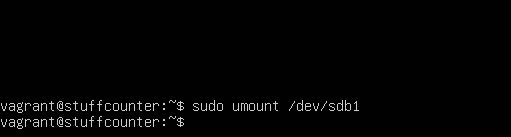
7. Unmounting the disk
Before remounting the disk to its final location, unmount it from the temporary folder:
sudo umount /dev/sdb1
8. Cleaning up the old folder
If you copied (instead of moved) the data, you must delete all remaining files from:
/var/www/client/public/files/
You can use Midnight Commander again:
sudo mc
9. Mounting the disk into the main data folder
Now, mount the new disk directly into the original folder:
sudo mount -t ext4 /dev/sdb1 /var/www/client/public/files
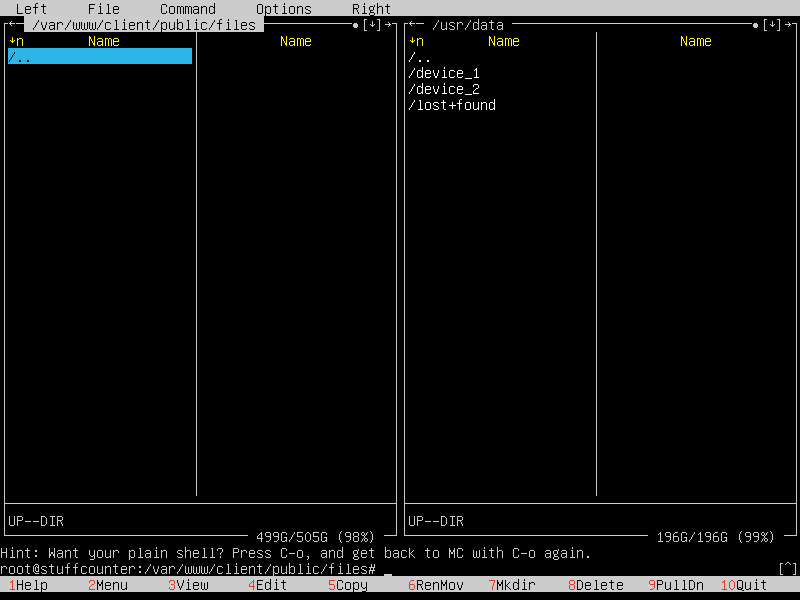
10. Checking the mount
Open Midnight Commander and navigate to:
/var/www/client/public/files
You should see the data that was copied earlier into /usr/data.
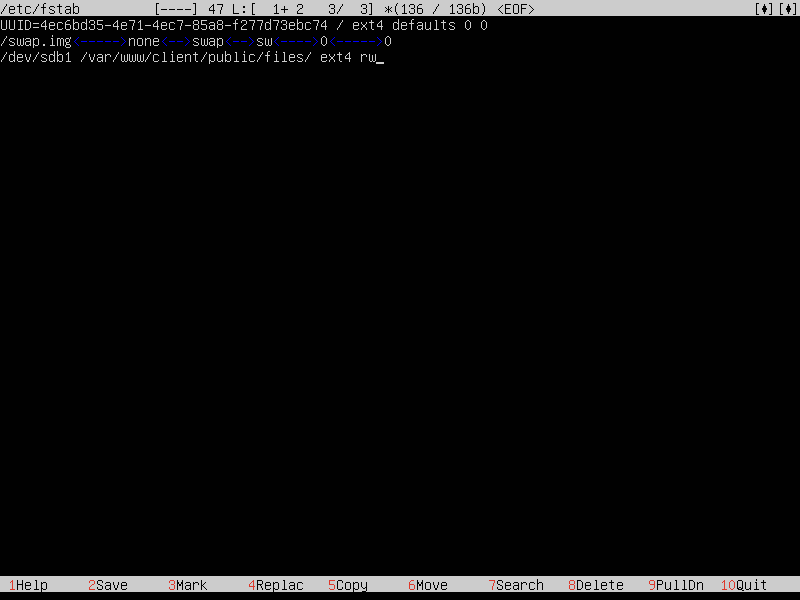
11. Configuring automatic mounting
To ensure the disk is mounted automatically after reboot, edit the /etc/fstab file:
sudo mc
At the end of the file, add the following line:
/dev/sdb1 /var/www/client/public/files/ ext4 rw
Here:
ext4 is the filesystem type
rw means the folder can be read and written
12. Assigning access rights
Finally, set the correct access rights so that new data can be written to the folder:
sudo chmod -R 777 /var/www/client/public/files/
If you have any suggestions or clarifications, please contact us at help@staffcounter.net