How to connect a new drive to the local server to enlarge the space
By default, the hard disk of the local server is 500 GB. But what will happen if the volume of files exceeds this value?
Let’s make a simple calculation: if one virtual device can store data up to 500 megabytes, then the maximum number of virtual devices will be 1000. But departments can have many more employees and computers!
If the virtual disk becomes full, new files will no longer be created, which will cause various failures in the server operation.
In order to increase the space for data, we suggest connecting either a real hard disk or a virtual one to the virtual machine. Then we will mount it in the folder where user data is stored.
The scheme is as follows:
1. Adding a real or virtual disk to the virtual machine;
2. The new disk detection;
3. Creating a partition on the disk;
4. Formatting the disk;
5. Mounting the disk to a new folder;
6. Moving files from the /var/www/client/public/files/ folder into the new folder;
7. Unmounting the disk;
8. Cleaning up the old /var/www/client/public/files/ folder;
9. Mounting the disk in the /var/www/client/public/files/ folder;
10. Checking the correctness of the mount;
11. Editing the /etc/fstab file;
12. Assign access rights to the files folder.
1. Adding a real or virtual disk to the virtual machine
Add the disk to the virtual machine
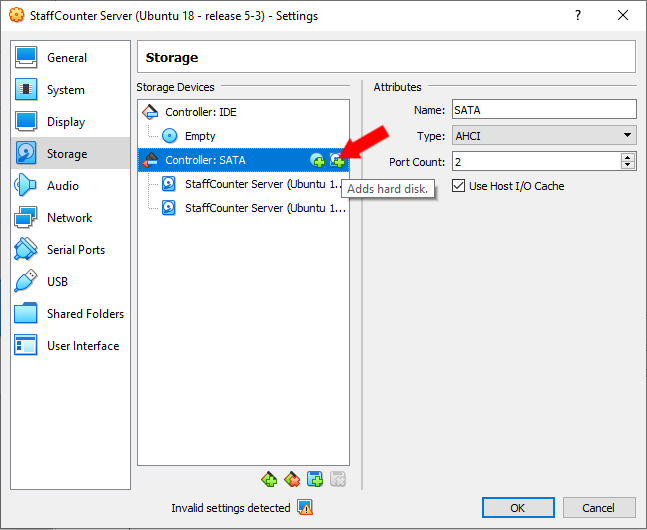 Create a new virtual disk file of the desired size or connect a real hard disk.
2. The new disk detection
Now you need to start the virtual machine and log into your user account.
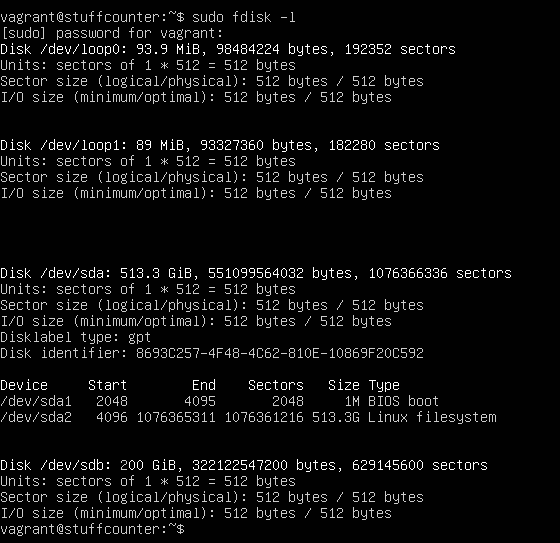
After logging in, run the command
sudo fdisk -l
It displays information about the available disks and partitions
The last one shows a new sdb drive with no partitions. In your case, it may have another name.
3. Creating a partition on the disk;
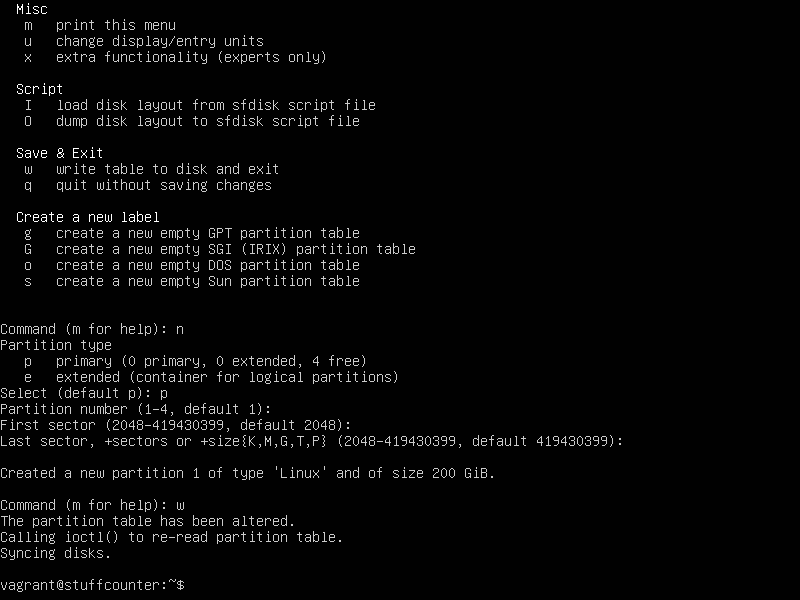
To create partitions on the sdb disk, run the command
sudo fdisk /dev/sdb
if you are doing this for the first time you can type `m` for help.
Then enter `n` to add a new section.
Select the main section by pressing `p`.
Next, we create partitions. If the partition will be on the entire disk, then we leave everything by default.
In the end, enter `w` to save the settings and exit. The partition /dev/sdb1* will be created.
*sdb1 is the name of our hard drive. In your case, it may be different.
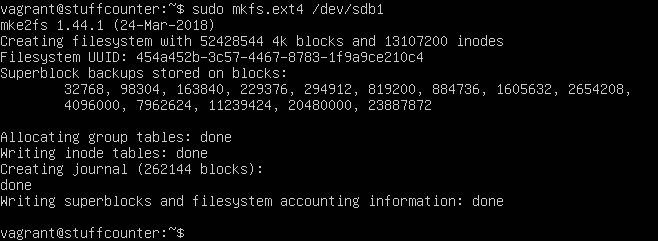
4. Formatting the disk. Creating an ext4 file system.
sudo mkfs.ext4 /dev/sdb1
5. Mounting the disk into a new folder
This should be done if the server has been running for some time and there is already data in the folders of virtual devices. So, in order not to lose them, we first mount a new disk in some folder on the server and move the already downloaded data into it.
Create a new folder to mount a new disk into it.
sudo mkdir /usr/data
mount the disk there
sudo mount -t ext4 /dev/sdb1 /usr/data

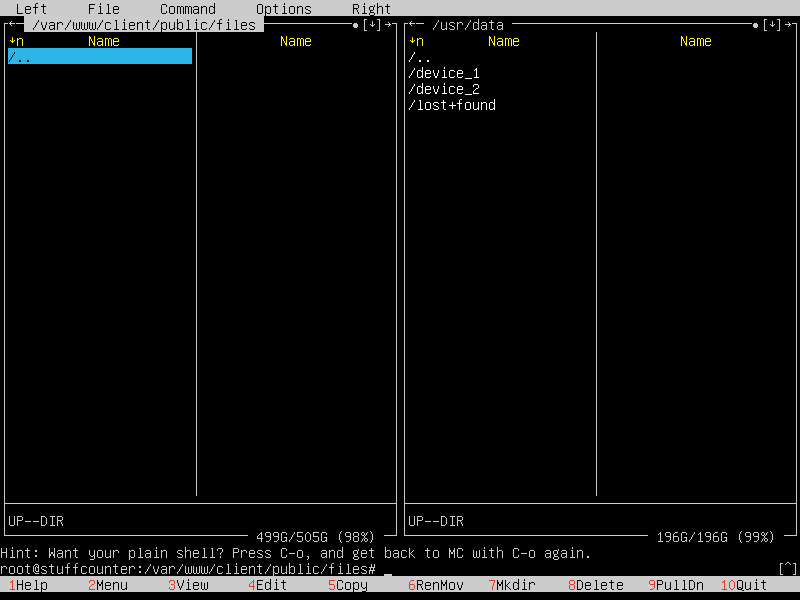
6. Move files from the /var/www/client/public/files/ folder into it
Run mc (sudo mc) and move all files and folders from /var/www/client/public/ files to the folder
/usr/data
7. Unmount the disk.
In order to mount the disk to another folder, you must first unmount it from the /usr/data/ folder
sudo umount /dev/sdb1

8. Cleaning up the /var/www/client/public/files/folder
If you did not move but copied the data to the /usr/data folder, then you need to delete all folders from the /var/www/client/public/files/ folder on the server.
sudo mc
Find the /var/www/client/public/files/ and remove all information from there.
9. Mount the disk into the /var/www/client/public/files/ folder
Now we mount a new disk with the data on it into the files folder
sudo mount -t ext4 /dev/sdb1/var/www/client/public/files
10. Checking the correctness of the mount
run the mc and open the /var/www/client/public/files folder
There should be data that we previously copied to the /usr/data folder
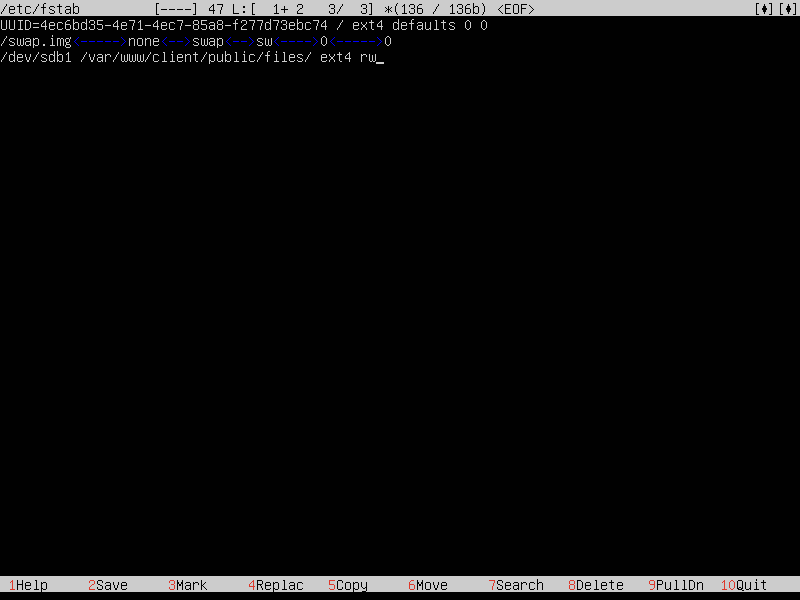
11. Editing the /etc/fstab file
In order to automatically mount our disk in the system after the reboot, you need to register it in the /etc/fstab file
sudo mc
add a line to the end of the /etc/fstab file
/dev/sdb1 /var/www/client/public/files/ ext4 rw
the rw parameter means to read and write
12. Assign access rights to the “files” folder
In order to allow writing the new data to the “files” folder, you need to give it read and write permission.
sudo chmod -R 777 /var/www/client/public/files/
If you have any suggestions or clarifications, please write us to help@staffcounter.net