StaffCounter Local Server
The StaffCоunter local server is just like the global server, except that it is located in your office. It has all the same features as the cloud server when it comes to collecting and processing information from computers where the StaffCounter monitoring agent is installed. Advantages of running a local server:
- Corporate data is kept safe;
- Unlimited room for data storage and an unlimited period for storing it;
- Ability to migrate settings.
The local server is installed on a Linux virtual machine under the program VirtualBox.
Mail us from your corporate email address and request a link to download a local server for testing. The test version works for 30 days from the moment of installation.
- Install VirtualBox on a particular computer.
- Download and decompress the archive containing the server in a new folder.
- Inside the archive, you’ll find an .ova file to import the configuration into VirtualBox.
- In the application of Oracle VM VirtualBox Manager choose File -> Import configuration…. Specify the path to the .ova file.
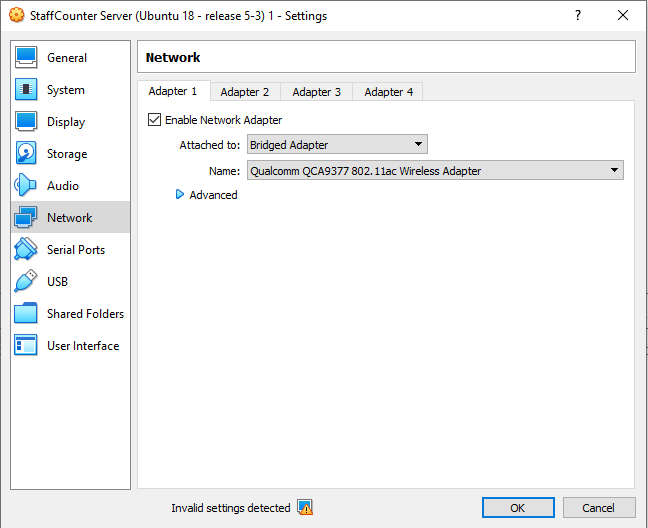
- The local server must be connected to the local network. Open the configuration for the virtual machine and go to Network settings.
- For adapter 1, point to what existing network card the program should connect to.
By default, the local server has a set network address (see the file Readme.txt in the archive). If it is necessary to change it, do the following:
- Launch the virtual machine. Enter the username and password from the file Readme.txt;
- Launch the mc as root:sudo mc;
- Locate the file /etc/netplan/50-cloud-init.yaml and press F4;
- Change the address field and, if necessary, the network mask;

- Save the file (F2);
- You can download the example of this file here
- Restart the virtual machine. To do this, exit the editor (F10) and the Midnight Commander program (F10), and then execute the command:
sudo shutdown -r now
Note: To fully turn the virtual machine off, execute the command
sudo shutdown -h now instead.
- To install you need a Linux server, preferably Ubuntu 20-22.
Receive a link to download the distribution kit for the local Staffcounter server by writing to the support service from your corporate address.
2. After installing Ubuntu server you need
-Assign a static IP address to the server;
-install docker with the following commands:
sudo apt-get update
sudo apt-get install \
ca-certificates \
curl \
gnupg \
lsb-release
curl -fsSL https://download.docker.com/linux/ubuntu/gpg | sudo gpg –dearmor -o /usr/share/keyrings/docker-archive-keyring.gpg
echo \
“deb [arch=$(dpkg –print-architecture) signed-by=/usr/share/keyrings/docker-archive-keyring.gpg] https://download.docker.com/linux/ubuntu \
$(lsb_release -cs) stable” | sudo tee /etc/apt/sources.list.d/docker.list > /dev/null
sudo apt-get update
sudo apt-get install docker-ce docker-ce-cli containerd.io
restart the server
sudo reboot
3. Login as root
Copy the distribution package staff.tar.xz to the server in the /home/user/install/ folder (if it doesn’t exist, create it and allow access)
4. Unpack the archive:
tar -xf staff.tar.xz
5. (optional) move the Staff/ folder to /var/www/
6. Start the local server:
cd /var/www/staff
./start.sh
To speed up the statistic update, you need to change the crones’ configuration file staff/data/etc/cron.d/crontab.
install */1 (one per minute) for the following processes:
– serveDeltaLogs.php
– wcDevicesStats.php
Now is:
– serveDeltaLogs.php –*/5 (once in 5 min)
– wcDevicesStats.php –*/15 (once in 15 min)
![]()
![]()
Working with the administrator panel
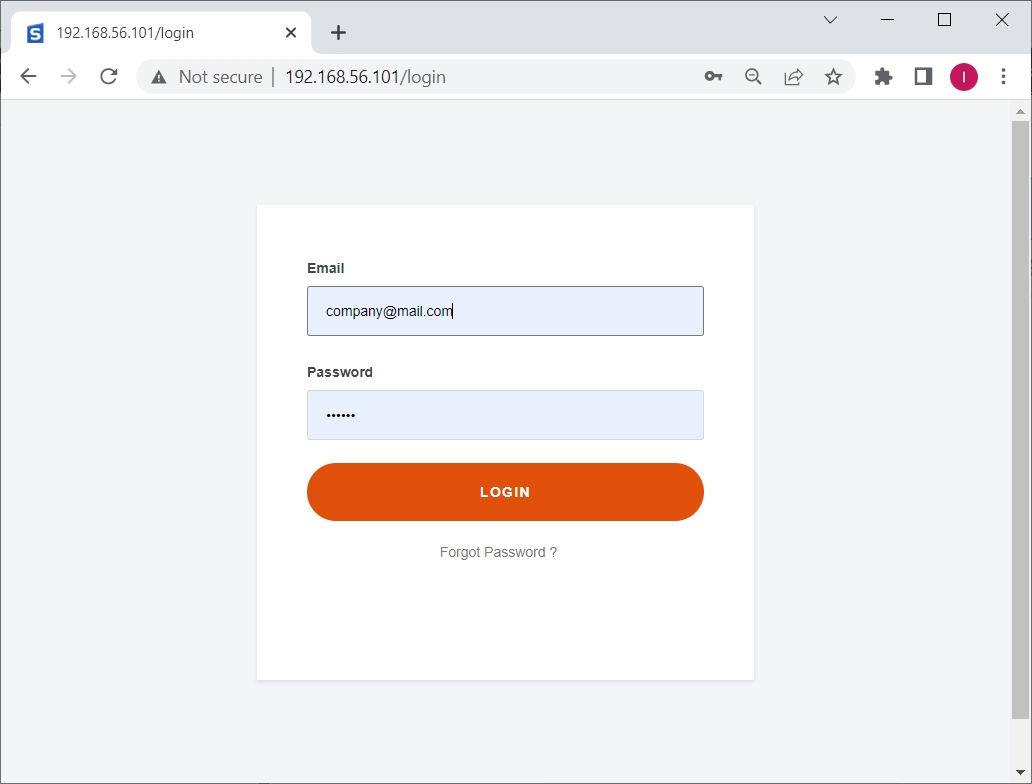
In the file Readme.txt, you will find the username and password for the administrator of the local server. Launch the Mozilla Firefox browser and direct it to address_of_local_server/login Enter the administrator’s username and password.
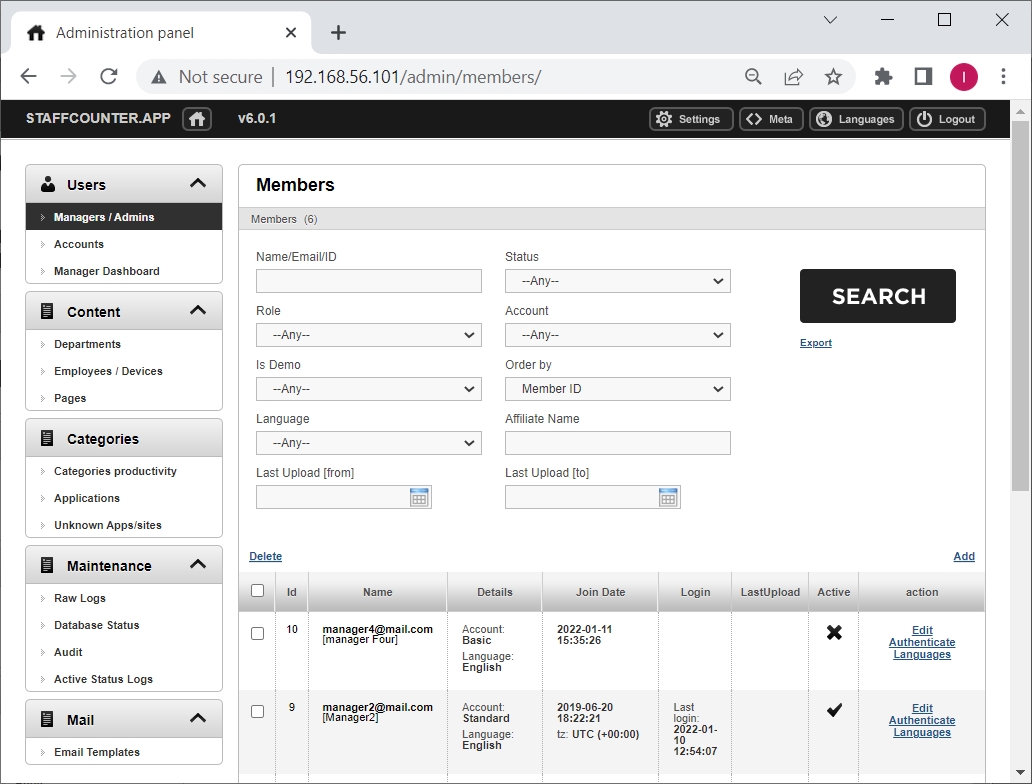
In the administrator panel, you can add, edit, and remove user accounts on the local server. To do it, select the item Managers in the table on the left. By using the commands Add and Delete you can add or remove a manager, respectively.
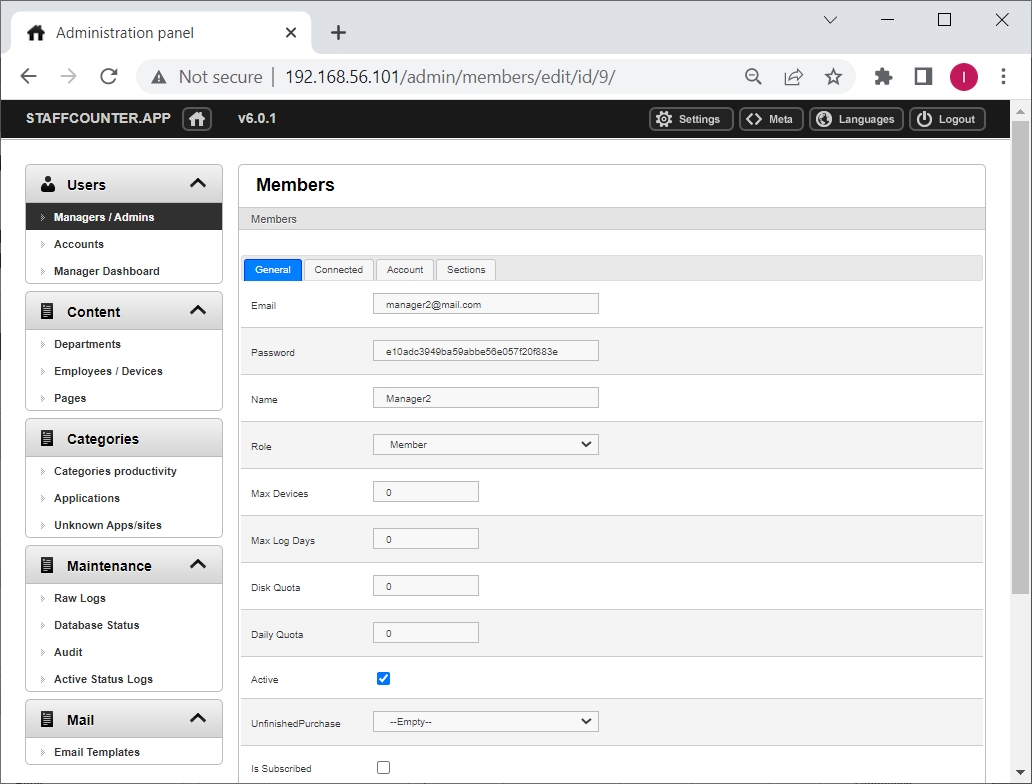
 Using Edit you can make changes to an account, such as the e-mail address, password, name, or role of the administrator.
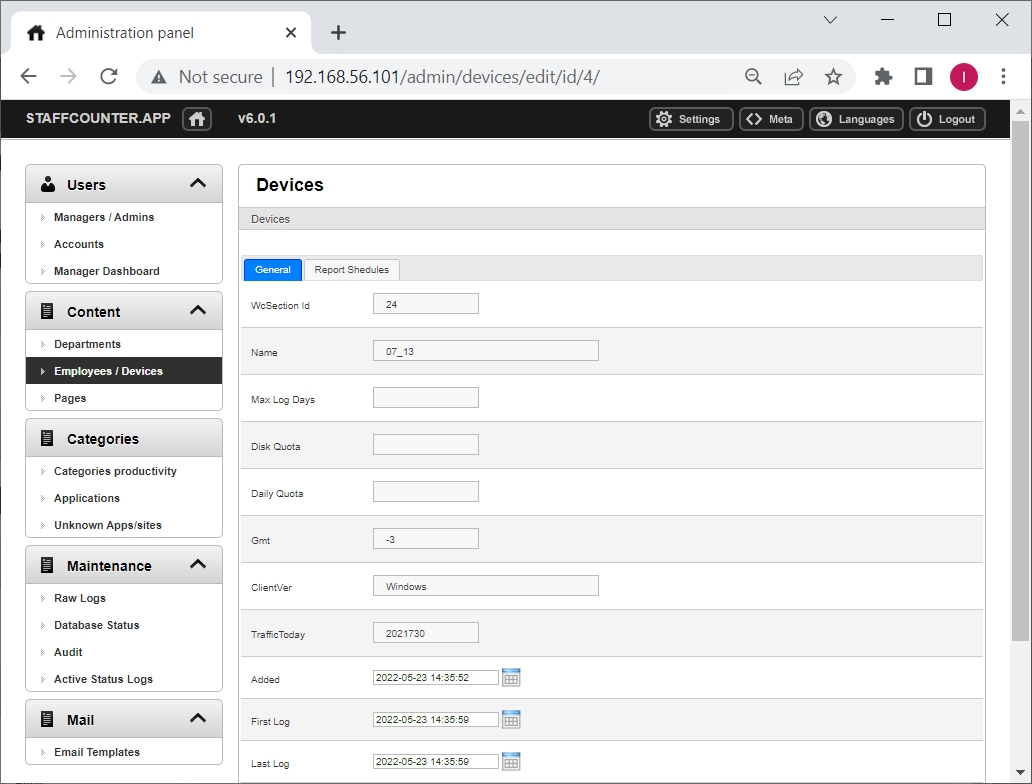
In the section Devices, you can delete or edit settings for virtual devices where data is uploaded by the agent programs installed on employee computers.
 In this window, you can easily find devices by the manager’s address, the name of the device and its ID, and the place it occupies on the server. Using Edit you can view and change settings for the given virtual device: the maximum amount of data saved on the server, the amount of time for which data is saved, as well as the device type.
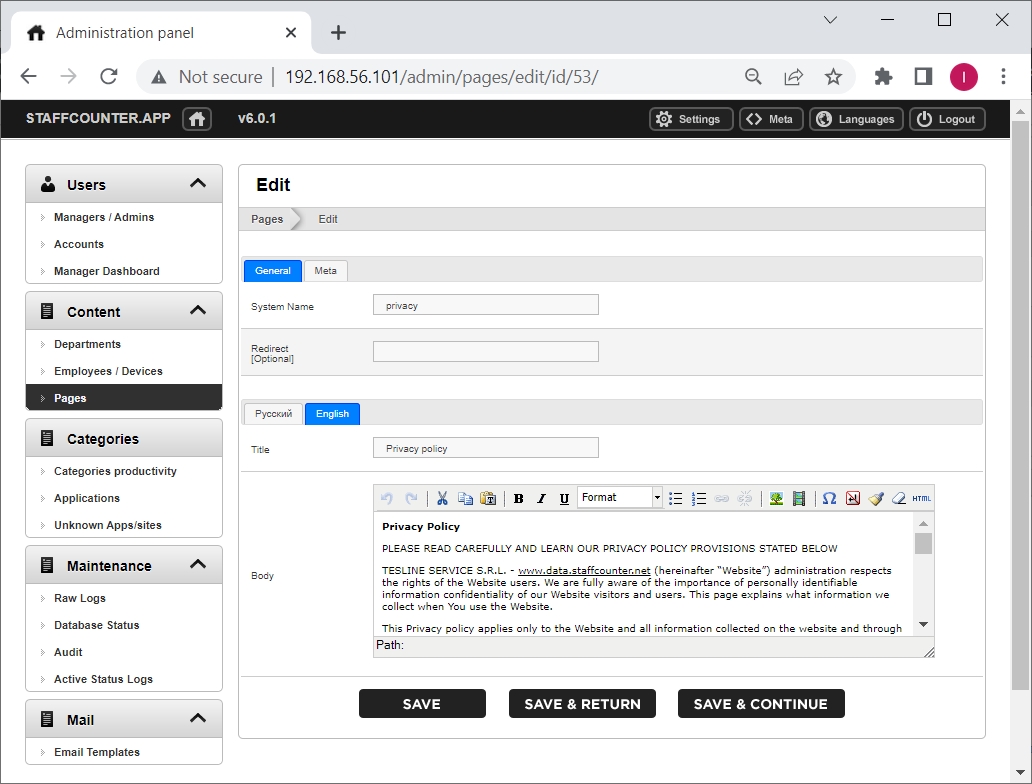
In the section Pages, you can add, edit, or remove webpages on the local service without affecting its performance.
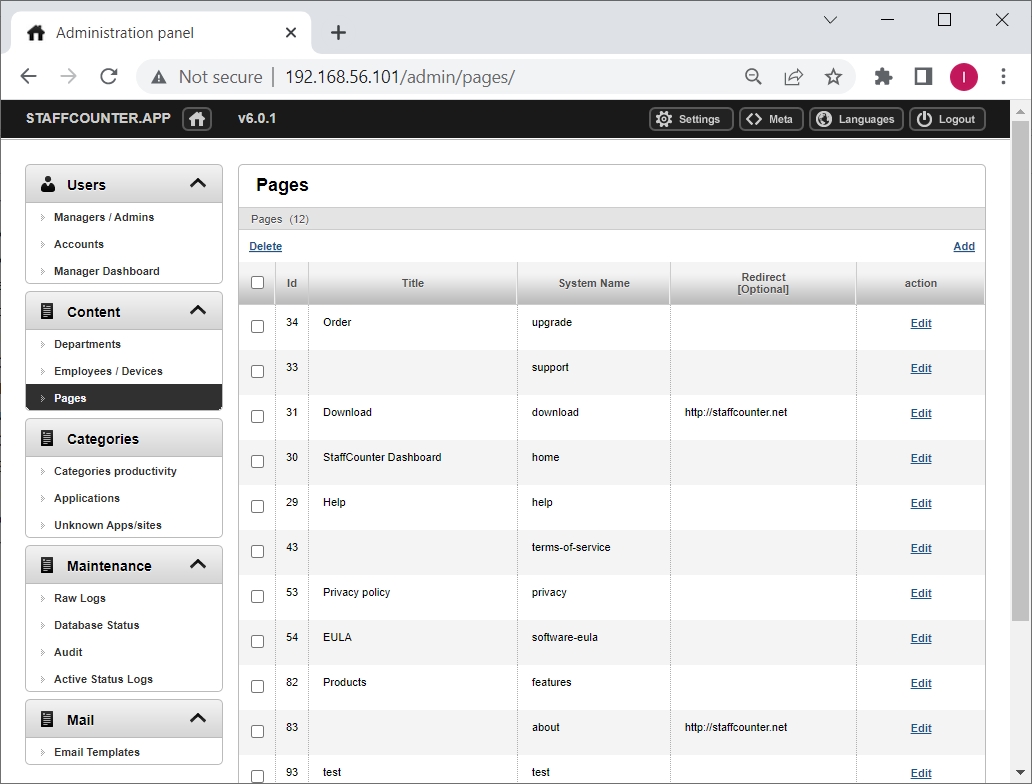
After going to the required page, click Edit. A site is made in several languages. Select the required tab and use the built-in editor.
In the section Categories, you can add, edit, and delete categories of applications and websites.
 After going to the required category click Edit. Specify the name and degree of productivity for that category.
In the section Applications, you can assign applications a default category.  After going to the required application click Edit. Specify the name and category for the program or web address.

The section Monitoring plays a supporting role and consists of the following parts:
- Row logs
Entries in this section relate to sessions when monitoring agents connect and upload data to the server. Each entry contains the client’s time, size of uploaded data, operating system version, agent version, and the virtual device ID. 2. Database status This section allows you to see the number of entries in each database table. Using this information you can trace errors in server operation.
 3. Audit In this window you can track the activities of site administrators when working with user accounts.
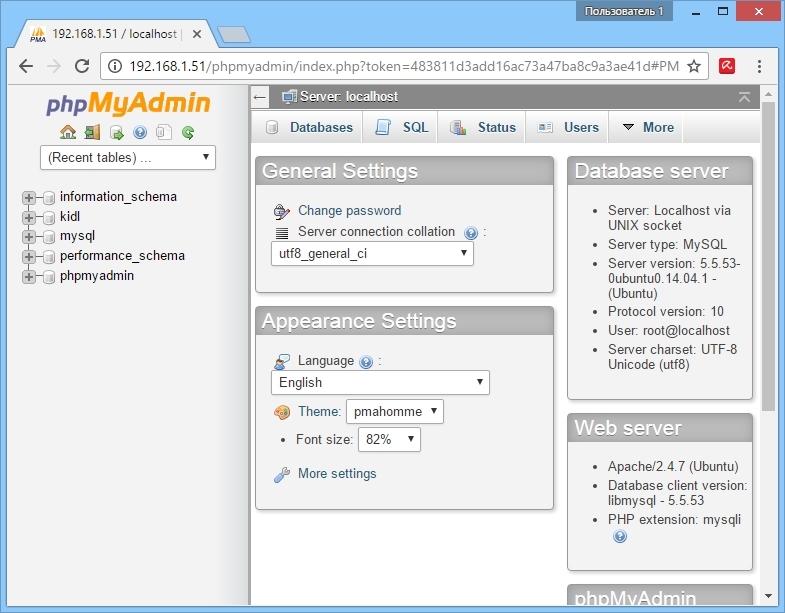
You can access the database by going to the address http://192.168.1.51/phpmyadmin/index.php Instead of 192.168.1.51 specify the network address of your local server. Use the username and password from the Readme file.
To change the timezone in the docker
1) open staff/ directory and stop the docker:
sudo ./stop.sh
2) open staff/image/ directory and edit the Dockerfile:
Write America/New_York (or another timezone) into the line:
ln -f -v -s /usr/share/zoneinfo/America/New_York /etc/localtime ; \
But in the data/etc/php.ini you have to write “;” before “date.timezone = Europe/Chisinau”
; date.timezone = Europe/Chisinau
3) open staff/ directory and execute
sudo ./start.sh rebuild
To install the timezone for server
sudo dpkg-reconfigure tzdata