Administration of the Local StaffCounter server.
The dedicated computer must have VirtualBox or VMware application installed.
You need to download the virtual machine image from the server and run it on a dedicated computer. The computer must be connected to the local network of the enterprise. The network discovery must be enabled.
To start the local server, just start the virtual machine. It is not necessary to log into the Linux operating system.
However, this possibility is provided. You can find the login and password in the accompanying documentation.
To shut down the virtual machine correctly, you need to log in to Linux and run the following command in the terminal
>sudo poweroff
By default, the network address of the virtual machine is 192.168.0.51
The administrator login address:
http://192.168.0.51/admin
login: company@mail.ru
password: 123456
 Here is the home window of the server admin area. In the middle, there is basic information about the server. On the right, there are fields for entering a registration key and receiving an activation code. On the left is the main menu.
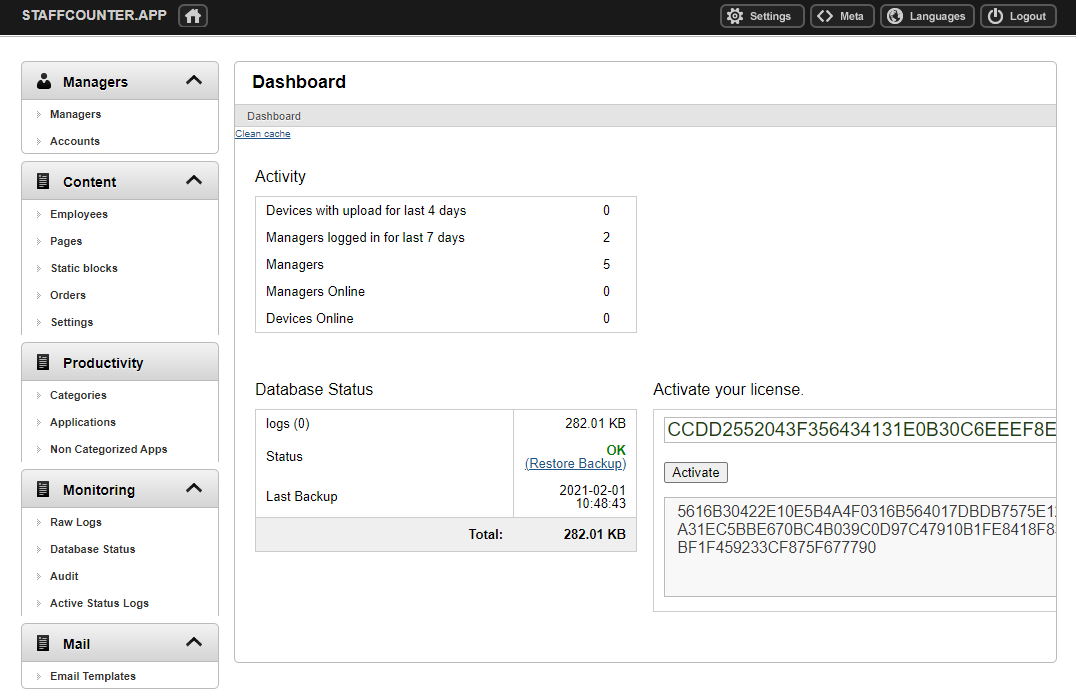 Managers menu. Managers are the users of the service, who enter the site through the address 192.168.0.51/login.
They can be directors of small businesses, department heads, HR managers, or simply employees tasked with keeping an eye on others.
By the way, the administrator with the login company@mail.com is also a manager. And every manager can be made an administrator.
If you click the Managers link, you will see a list of managers registered on the site:
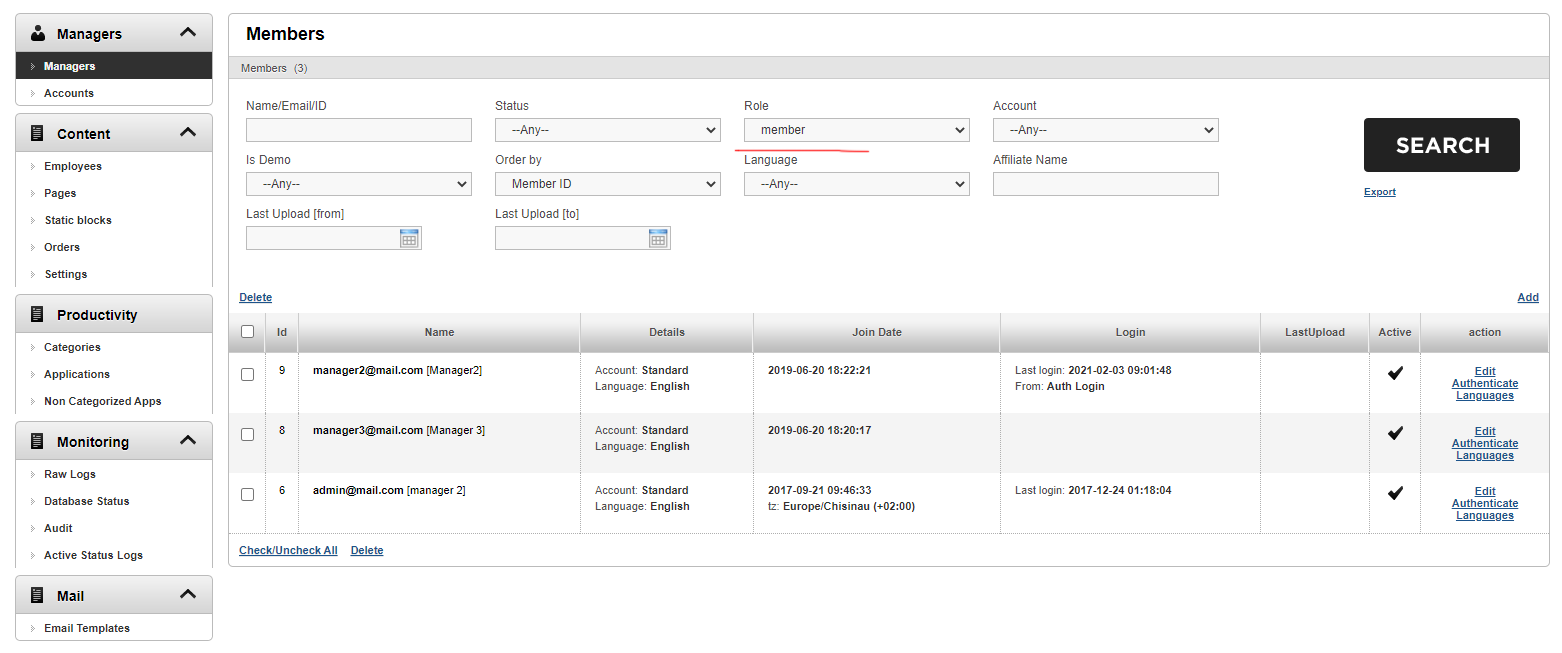 To find a manager, enter either the name, email, or manager ID into the Name/Email/ID field. After that, click the Search button.
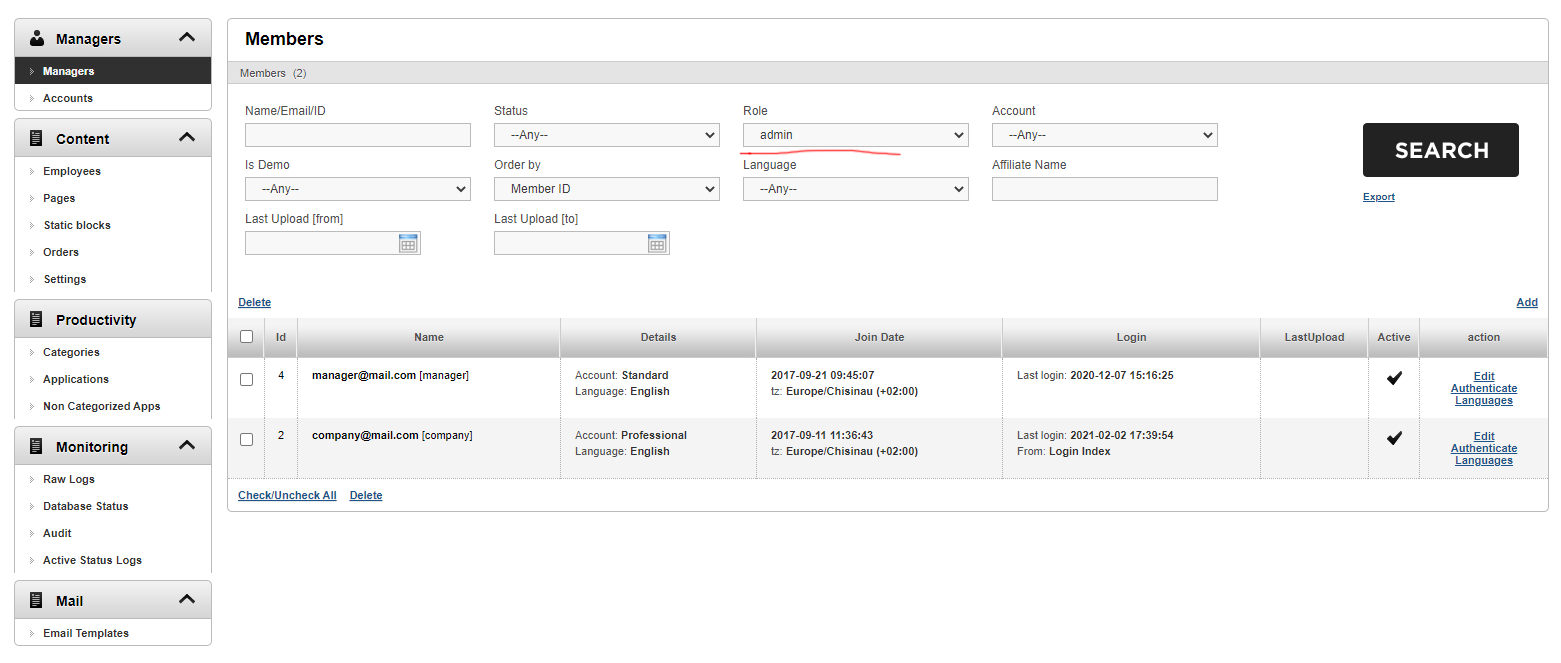
You can use the filters for selecting information. By default, there is a “member” value in the Role field. This means that we are looking for ordinary users of the site. If you select the “Admin” value, then the system will show administrators, those, who can enter this administrative part of the server.
In the Managers window, you can create a new manager, delete an existing one, change the settings (Edit link), and also go to the user profile of any user (Authenticate link).
Click the Edit link for a user. Here you can change the email, name, and password, specify the user role, and limit the maximum number of connected devices, storage duration, disk quota, and daily download quota. In addition, you can temporarily block a user using the Active checkbox.
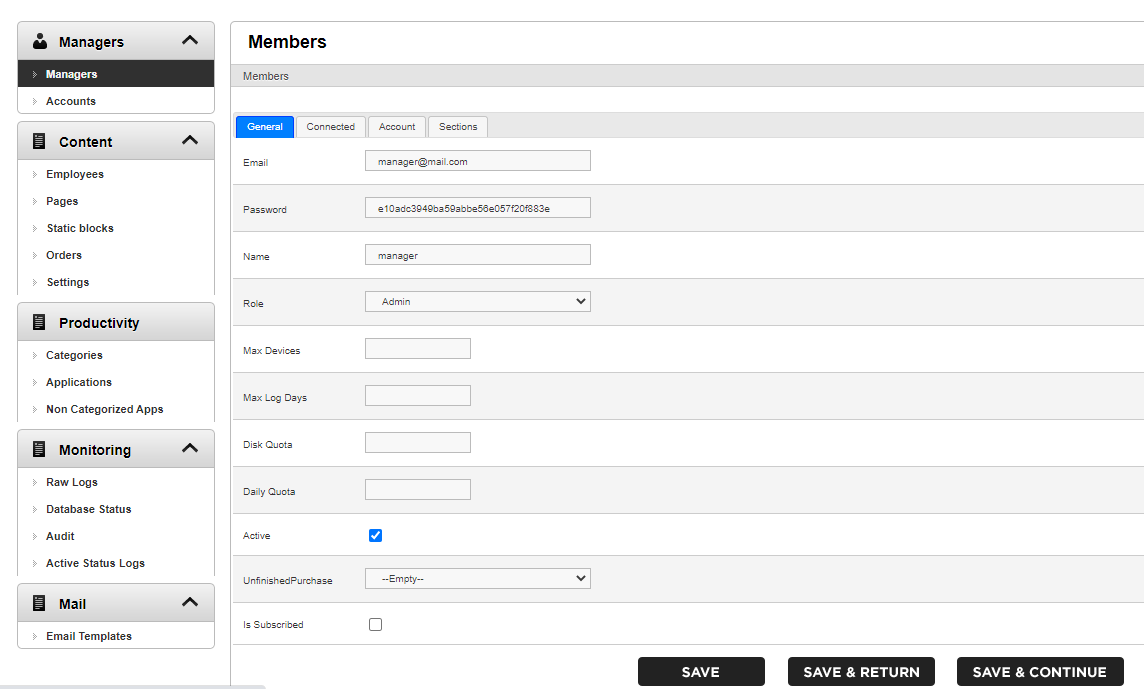
If we do not limit the values in these fields and leave everything by default, then these values will be determined by the type of subscription of this user. You can change the type of subscription on the same page on the Account tab.
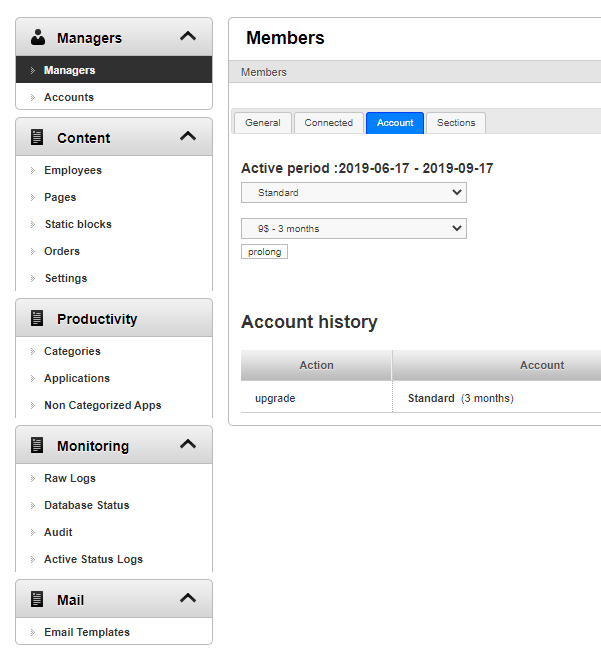
We will talk further about what the Account is and what it is for.
The Accounts menu. Here you can see 3 types of subscriptions. You can change the maximum number of connected devices, the amount of data storage, and the disk quota for each connected device.
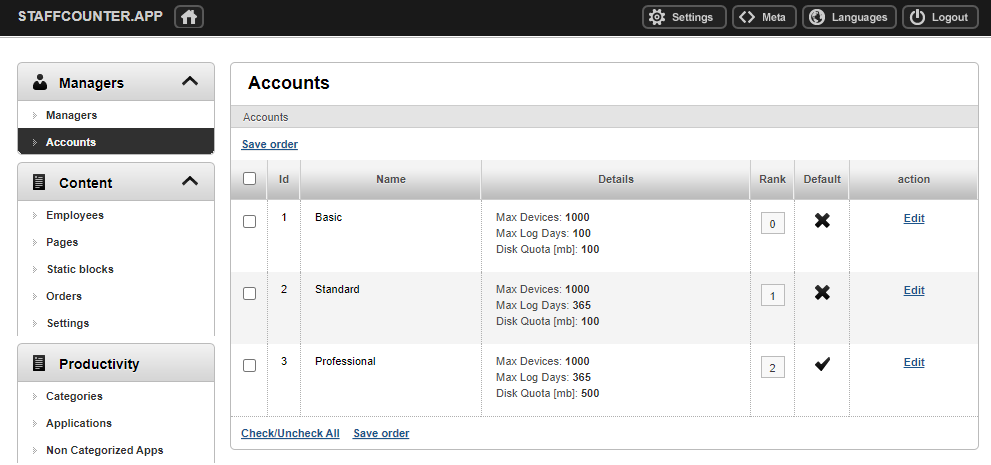
Why do we need different types of subscriptions on the local server? The local server capability is limited by processor power and hard disk dimension. Therefore, you need to rationally distribute them among all users. There will be departments that will upload a huge amount of screenshots, and they will need more disk space. For other departments, the data storage time will be critical.
Here you can edit each type of account. You can change the name, the number of devices, and the storage duration. One of the types is assigned by default. This means that each new user will be automatically assigned this type of subscription.
Employees menu (devices). The connected employee’s devices are displayed here.
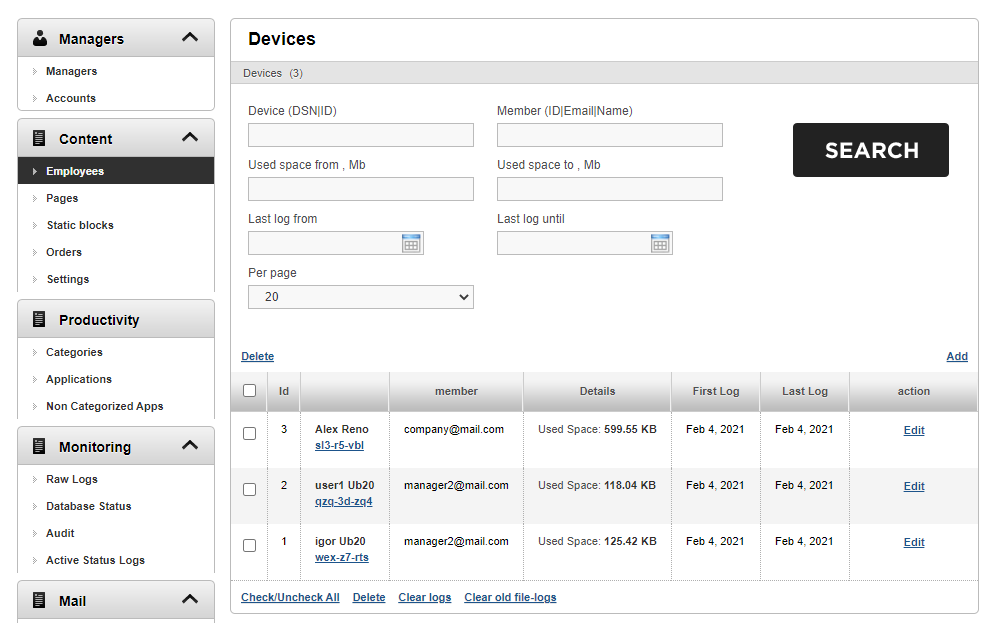
In the table, you can see which user (manager) each device belongs to, and how much space on the server is occupied by the files downloaded from this device when there was the first and last log. Using the filter, you can find the desired device by the name or email of the manager, by the amount of space used, and by other parameters.
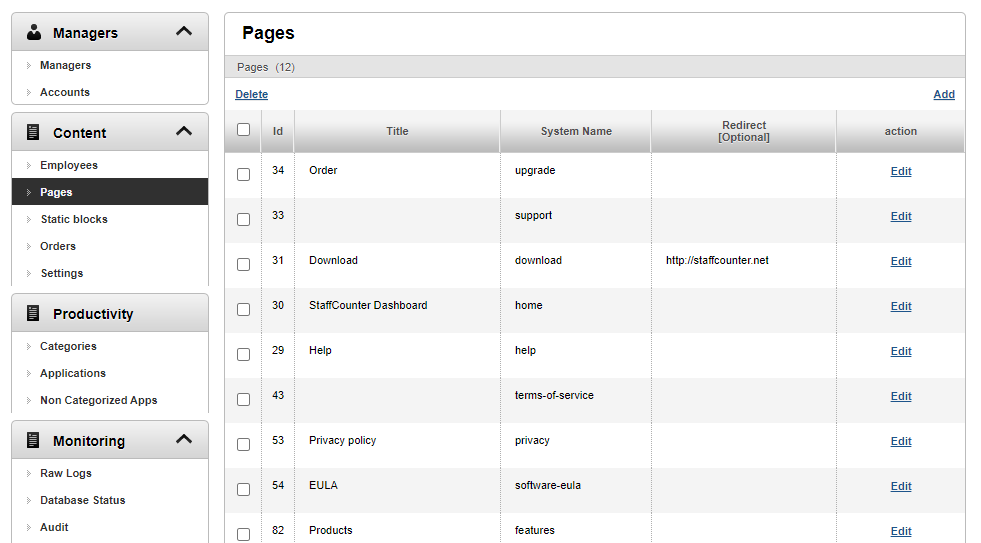
Pages menu. This page displays the static pages of the local StaffCounter server. Here you can add, edit and delete existing pages. Typically, pages are used to provide some support information to clients.
Settings page.
Here are the options, that you can see on the Settings page in the public area of the server. These parameters are passed to monitoring applications to enable or disable specific functions. For example, the “keystrokes” parameter, if enabled, forces the application to collect the typed text. On the users’ Settings page, this option is named Record text typing statistics.
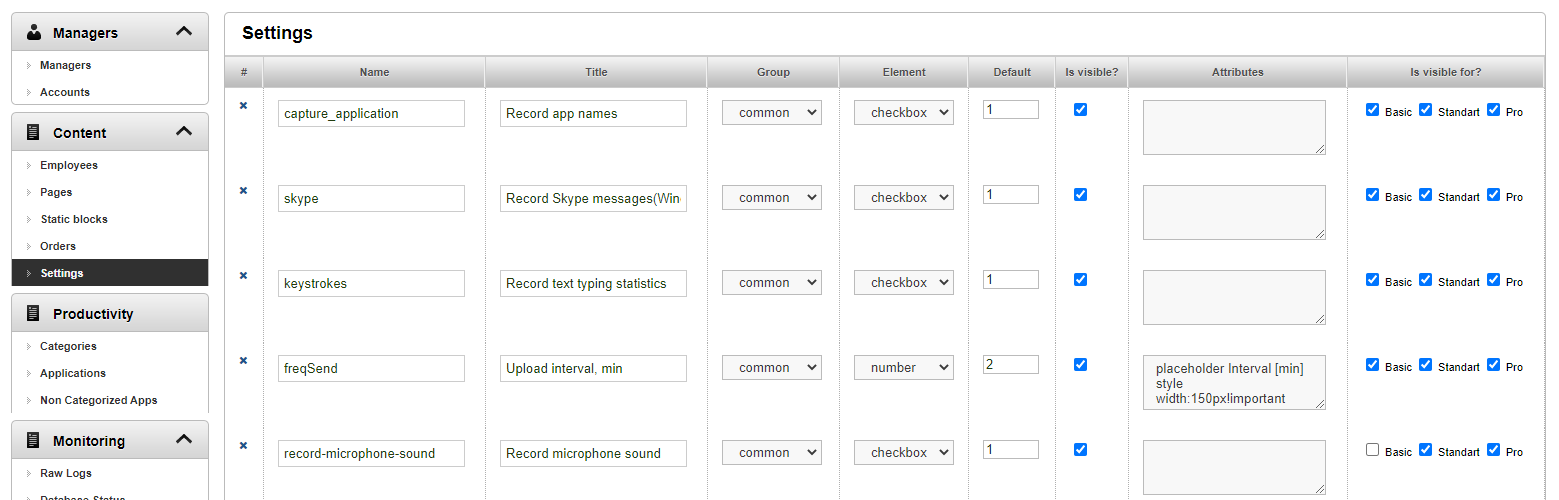
Is there any point in modifying the settings? Short parameter names like capture_application, skype, etc. cannot be changed, because the Staffcounter application on a computer or phone is waiting for a parameter with this only name. If a new function in the application appears, then you have to add the corresponding parameter to this page.
You can change the parameter name, default value, and parameter visibility. The absence of a parameter in the configuration for the application will mean the value is 0.
In the “Is visible for” column, you can enable/disable the visibility of the parameter for a certain category of users.
Categories page.
All applications and websites can be classified into several categories. There are 7 categories by default.
On this page, you can see the existing categories, and add or remove them.

If you click on the Edit link, you can rename the category or change its value: to productive, unproductive, and neutral.

In the simplest case, you can leave only 2 categories – business and entertainment. Then all applications and user sites will be divided into them.
Attention! The user himself makes the division of programs and sites into categories individually for each department, but there are also default values.
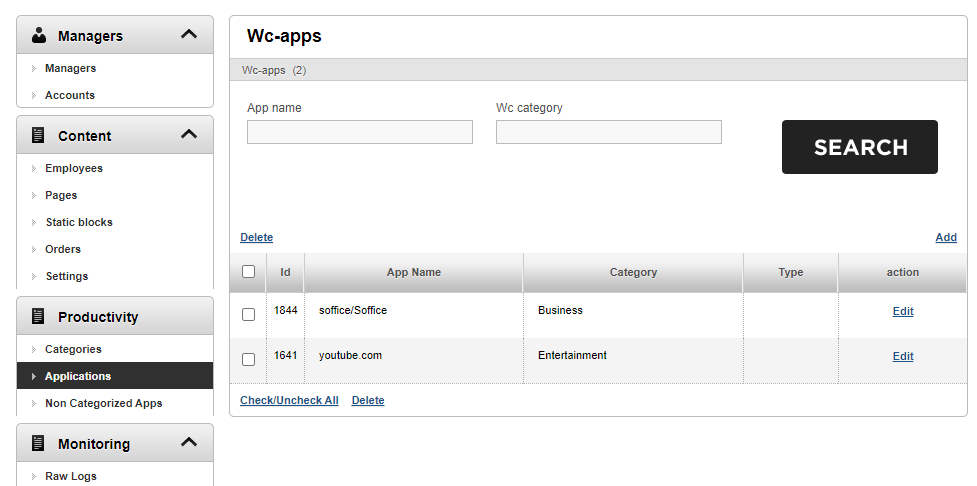
On the Applications page, you can see apps that are categorized by default. Here they can be moved to another category (using the Edit command) or deleted.
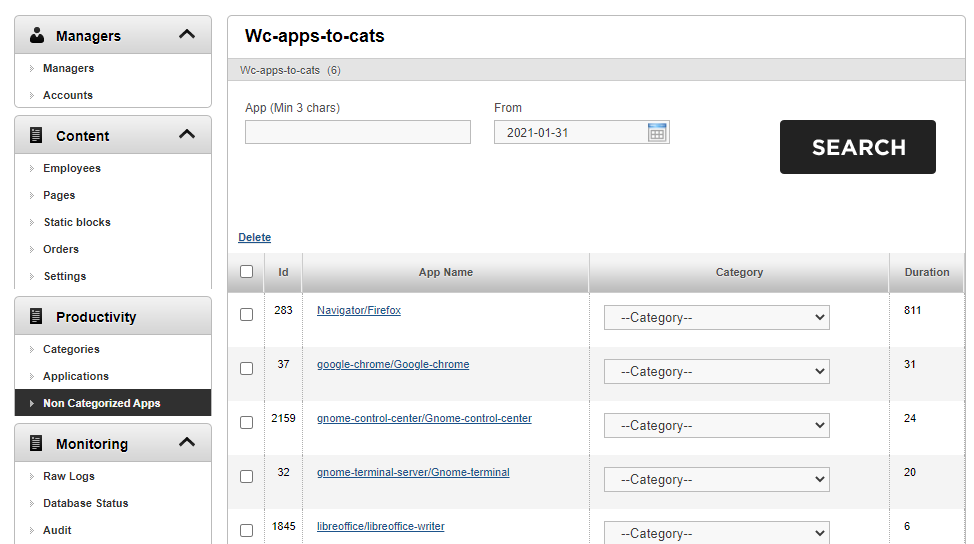
The Non-Categorized Apps page lists apps that are not categorized by default yet.
Raw Logs page. The Staffcounter program sends data to the server in parts. Screenshots are sent to the server in full, while logs and audio files are split into fragments. The arrival of each fragment or file is documented on the Raw logs page.
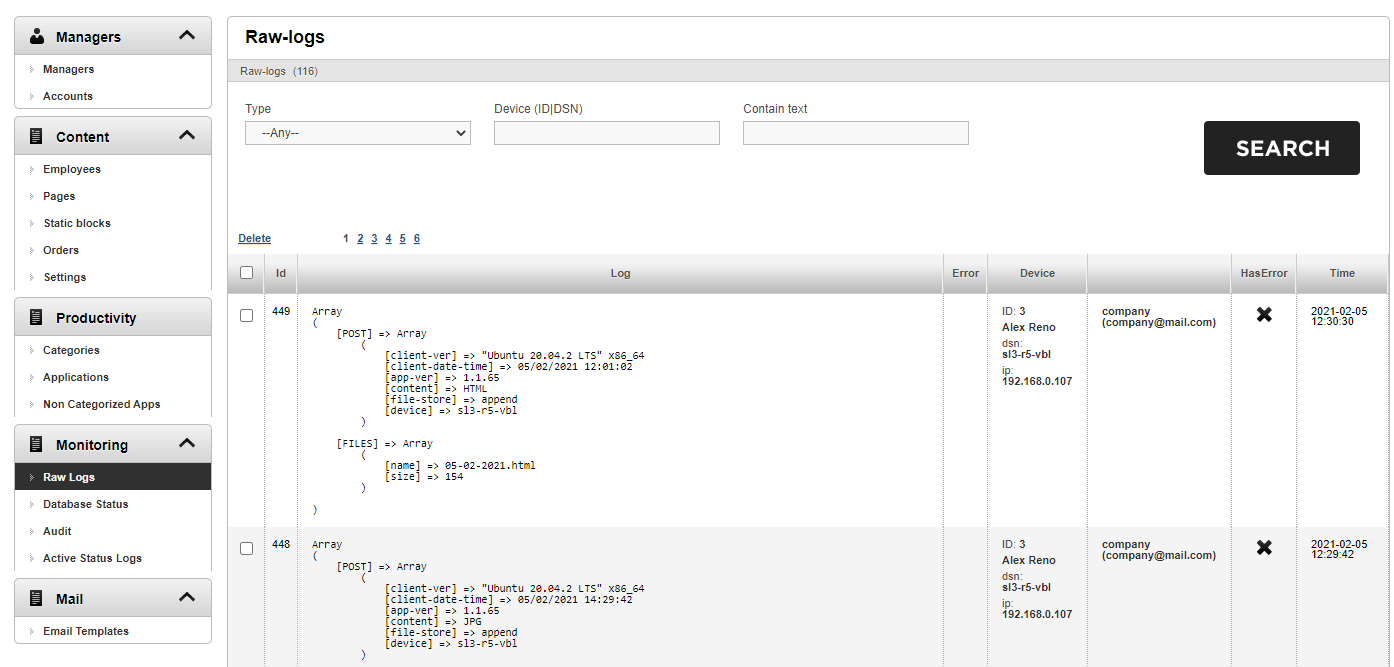
In each entry, we can see the version of the operating system, the time it was sent on the user’s computer, the version of the Staffcounter program, the type of content, the method of processing data for the server, the device ID, the file name and its size.
The second column displays the device name, IP address, account email, and server time.
From this data, for example, you can determine which version of the Staffcounter program the user is using and whether it is suitable for the operating system on the user’s computer.
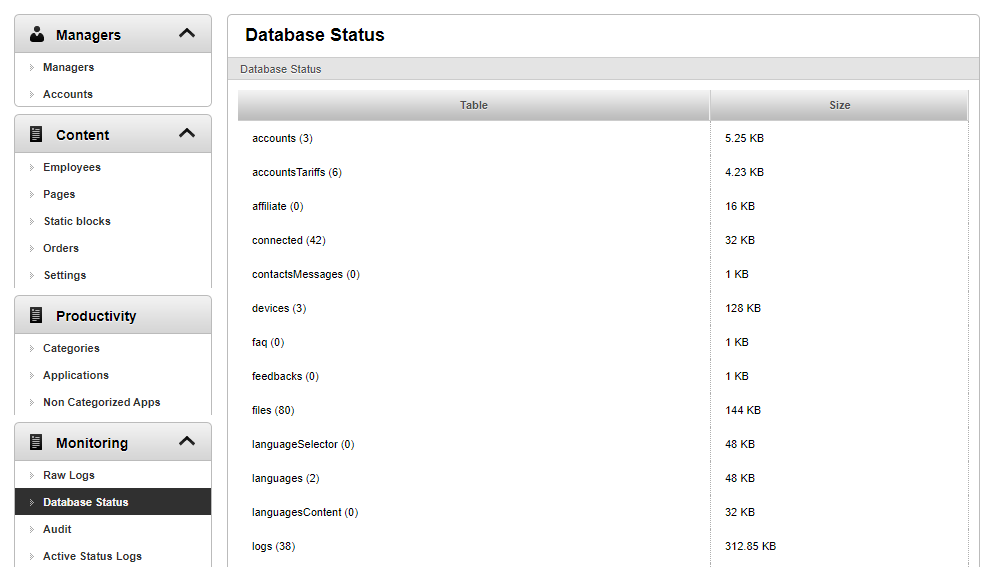
The Database Status page displays how many records each database table has and how large it is.
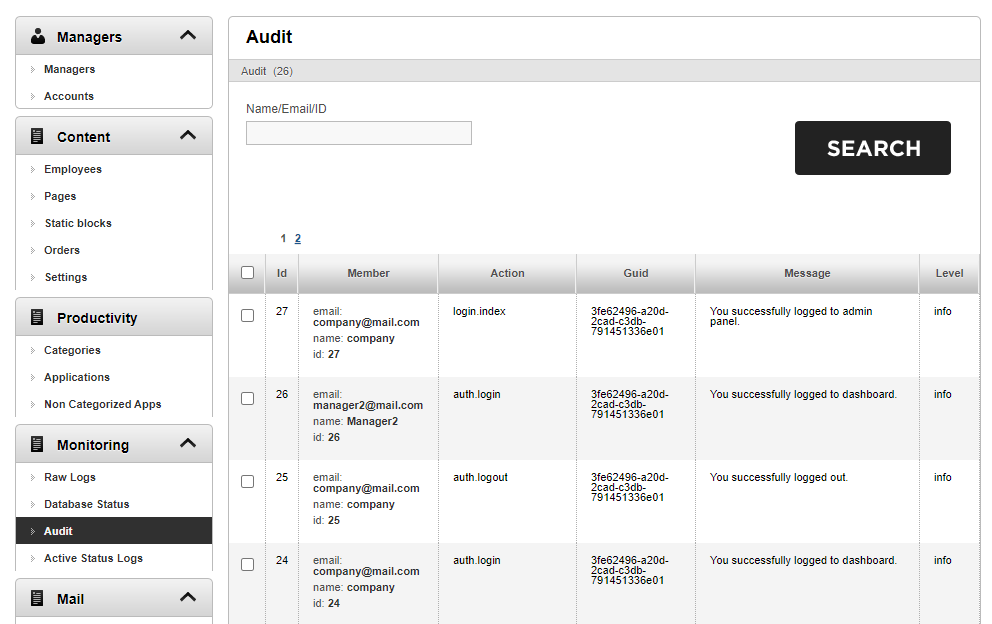
The Audit page displays the activity of users in the administrative and public parts of the server.
You can select a specific user by his ID or email.
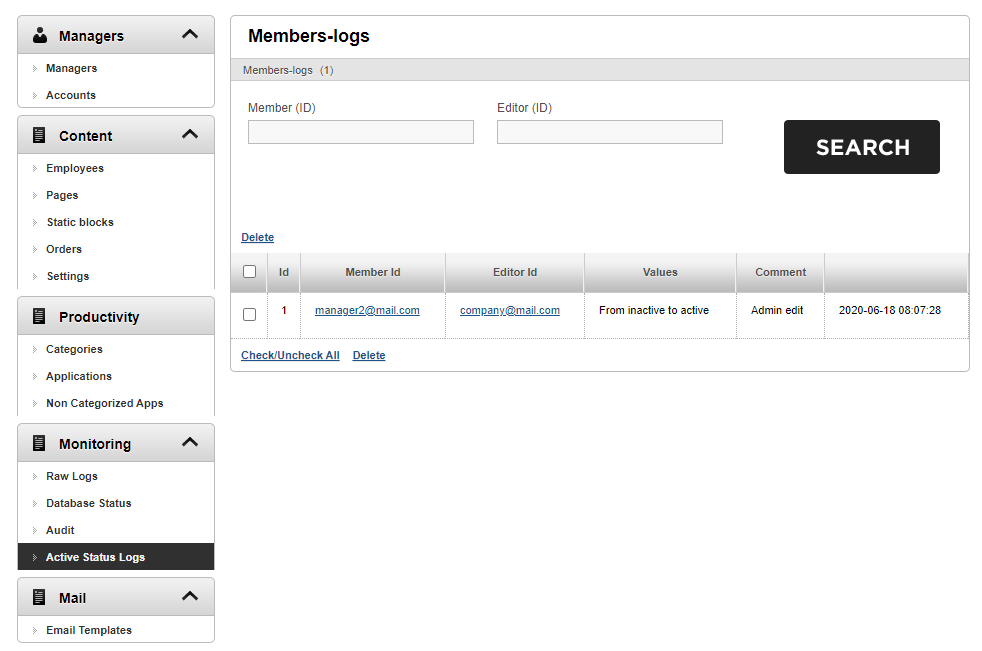
The Active Status logs page displays information about the transition of users to active status.
The Email Templates page shows templates for email messages sent to users, for example, after registration, when changing a password, etc.

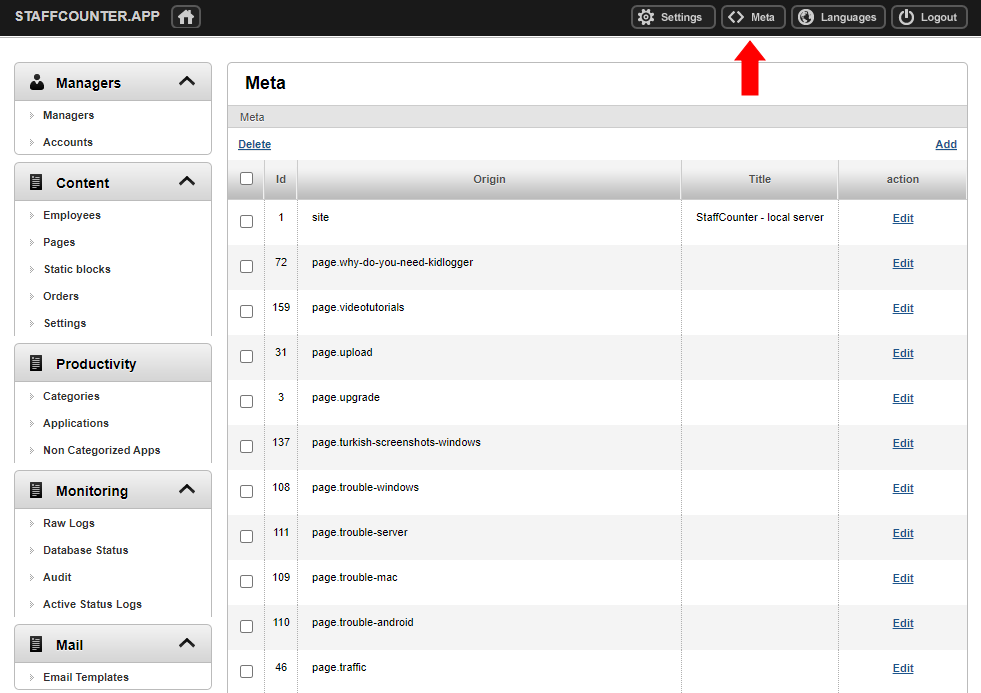
On the Meta page, you can add meta tags for the pages of the site.
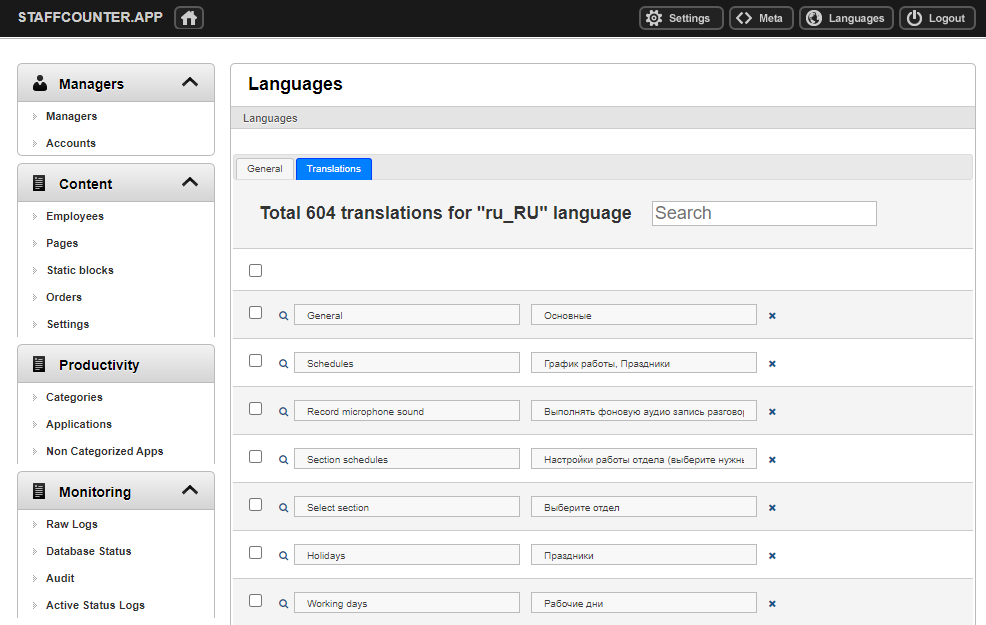
On the Languages page, you can add and remove languages for the site.
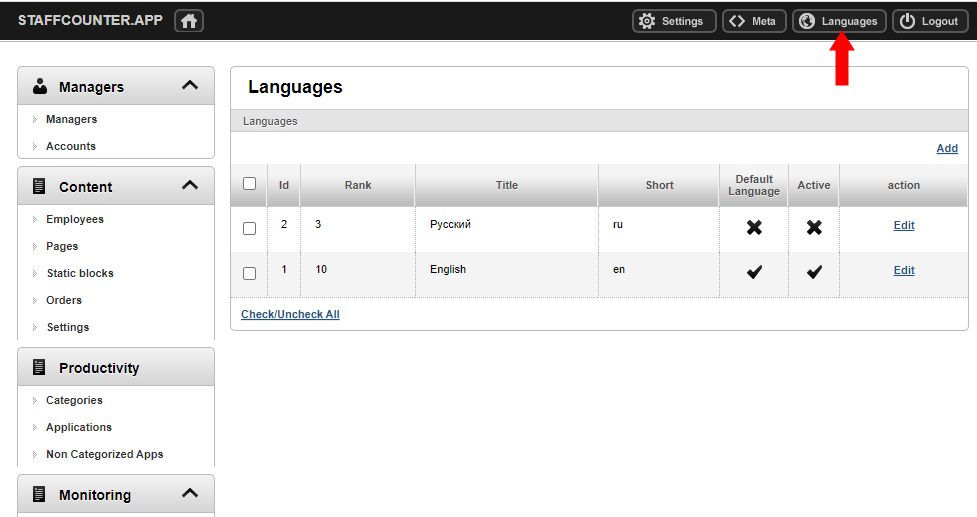
One of the languages is active by default. In our case, it is English.
In order to edit the translation of the site into another language, you need to click the Edit link. On the Translations tab, you can add a word or phrase in English and translate it into another language. If this word or expression appears on a dynamic page of the site, it will be replaced with the translation.