Configuring an email address for reports and notifications in the StaffCounter local server
To send reports and notifications, you need to configure your local server.
Step 1. Enable Sending Notifications
– Launch the virtual machine.
– Log into the user account using the username and password provided in the readme file.
– Open **Midnight Commander**.
– Find the .env file in the /var/www/client/ or /var/www/staff/ directory and open it for editing.
Remove the variable:
DOMAIN_ENV=local
Or assign it an empty value:
DOMAIN_ENV=
—
Step 2. Connect an Existing E-mail Address
The local server must use a valid e-mail account.
Create or use an existing mailbox, and add its username and password to the .env file.
At the end of the file, enter your e-mail settings (address, password, port, and host name).
Example: Hotmail configuration
SUPPORT_EMAIL=your_mail@hotmail.com
SUPPORT_NAME=yourname

MAIL_DRIVER=smtp
MAIL_HOST=smtp.office365.com
MAIL_PORT=587
MAIL_USERNAME=your_mail@hotmail.com
MAIL_PASSWORD=your_password
MAIL_ENCRYPTION=TLS
Example: Gmail configuration
1. Go to https://myaccount.google.com/
2. Enable 2-factor authentication.
3. Open Application Passwords.
4. Generate a new app password (e.g., xxxxx_2fa_pass_example).
Update your .env file:
SUPPORT_EMAIL=your_mail@gmail.com
SUPPORT_NAME=yourname

MAIL_DRIVER=smtp
MAIL_HOST=smtp.gmail.com
MAIL_PORT=465
MAIL_USERNAME=your_mail@gmail.com
MAIL_PASSWORD=xxxxx_2fa_pass_example
MAIL_ENCRYPTION=SSL
—
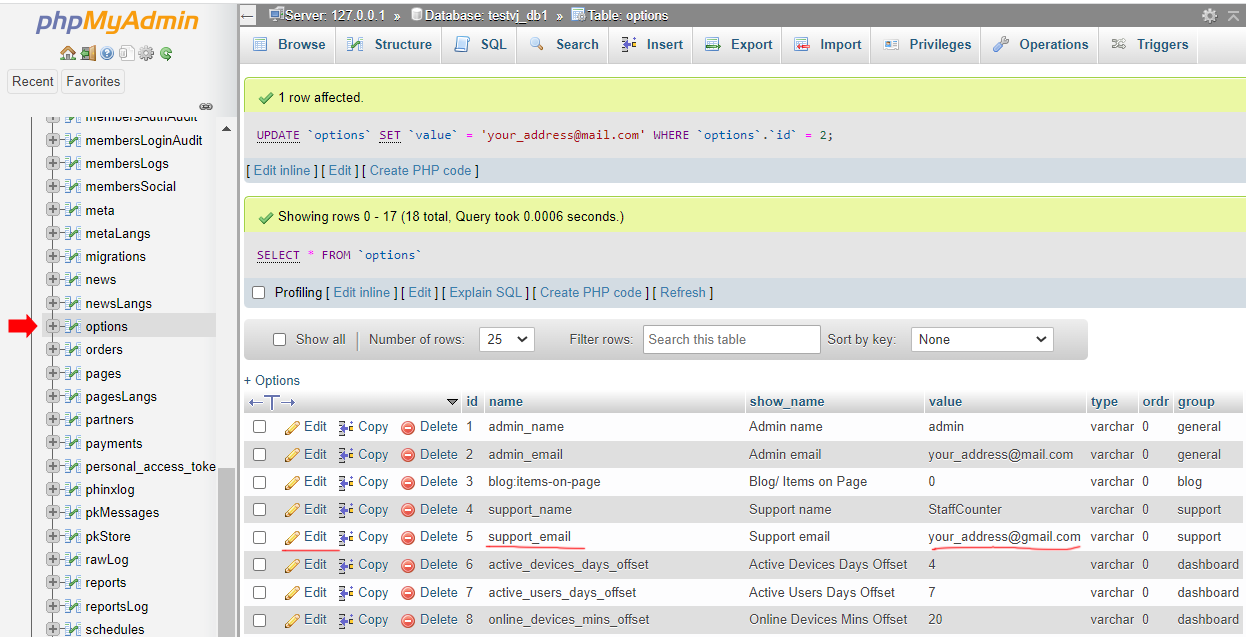
Step 3. Update the Database
– Open **phpMyAdmin**.
– In the Options table, update the field support_email with your new address.
—
Step 4. Restart and Test
– Save the .env file.
– Restart the server:
sudo reboot
To test the connection:
1. Create a report.
2. Click on the Twitter icon.
